Flatlands #1

Hardline Crawlers - Rock Bouncer Builds, Tech & Off-Road Trail Talk

Help Support Hardline Crawlers:

Bought myself a new lil welder so that I could do the aluminum interior work myself. With 0 experience and being a broke mofo I decided against a Miller and got a 185 everlast

d840cddf32f749308c38e2bfb11c1ec1.jpg


Dashboard and center console getting fit

f66ecbfe1c6514eebbafbedbf4f403a6.jpg


Switch panel deal

cf84b37ea719a763dc7c69ca4d3c0f37.jpg


Lil gauge cluster idea, this is taking a bit to get ironed out the way I want.

f9a1631f7d6c1f8a7a71bafbc931a540.jpg


More panels , this one is spaced out from the inner foot well, hoping this air gap can knock down on some of the heat from the header.

40a22755e8b1db8ebf740890bc68f98d.jpg


Inner foot well for reference

1805d88e2f2ba06d07a5ae82e27ea3aa.jpg


Rocker guard/fancy foot hold

0a8f8241a356e4bafa51f05aad016f85.jpg
 
Sway bar link mounts, these have a top plate as well, just don't have a picture right now.

06daa4a3c61732a23700122e67573c1b.jpg


834d7d4e7a0fa7cf6624a4b4917491c8.jpg


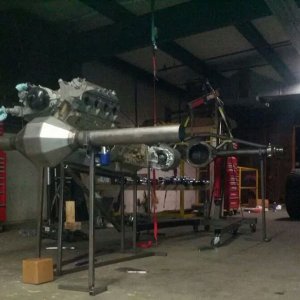
Trued up the mid ship shaft andbearing, didn't have a dial indicator so I rigged up something for a reference point at least.

b348ee9c8788d548e19c317ccd05d339.jpg


Stuck a real motor inband accessories on it, had to change a few small things between the mock up and real block nothing major tho.

f324084d3b7ac10e3ba6708d4d0c7cff.jpg


And then immediately started pulling parts that weren't needed for mock up once I knew it all fit.

127a6aec8fef35ebee66e06c780077b8.jpg


Welding..

cafaf7d4ea7c3c24c39771ffca7ec45f.jpg


Head mounts

a6c76a4c27cd294fc4165f29510b9b19.jpg


ab1fe1a49605a2657751f7aedb19ad22.jpg
 
Before the trans went to be built we decided to chop it for the ultra bell.

296a05e5ba59483f086997f9e5afc741.jpg


Never done this before, so I made 2 cuts and then final fitted with a 40grit flap wheel.

f6e5c556c33fb8928bf82f4d0d14c411.jpg


0e7582ac8bb129ff19f7efbe933bf1f7.jpg
 
Glad to see some updates on this build.

The rocker guards/fancy foot cutout with your name cut into it is a nice touch.
 
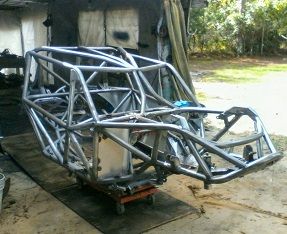
Stripped it all the way down for final welding and some work on the bottom.

6f24dd124d23e97a45898cdd20e4fb1a.jpg


Need more room in the shop already...

b50c0f4b6c884612b448cd166e05be1f.jpg


Flopped it over to get to the hard to reach spots.

4e9c5ac53abdf3f4f58d421461ca1592.jpg


Decided that wasn't easy enough so I put it on it's lid and put the roller table under it.

ea85055f4da99ffa2d955e22194f39c1.jpg


Ahh..much easier to finish the boxing plates on the link mounts

479b3ce0e14b0f67e895e6b2a00eca79.jpg


As well as welding out this kinda stuff.

1093d4f671bef89c6fa5e5e0bc7a07ce.jpg


Patterns for the skids, got it all tabbed out for the skids when it was flipped

7c7da0ec7e1ddbde9ce9a8728d627b14.jpg


And back right side up...

10cf7bc8fb615557549e126124cdd3f1.jpg


This gets us pretty much caught up

Chipping away at the aluminum tonight, still trying to figure this Tig thing out

4216bd792038ed203264fafc4db5d68f.jpg
 
Trying something different with the shoulder harness tabs...hopefully they keep Ray in the buggy.

881b02ab08da0e984b90f3ed9e3675f7.jpg


29c4af202ecb7f6f31aa58373c6eaf47.jpg


Winch mount and bump stops, ended up leaving them in boarded for now, if we start hurting shocks or bending bolts I'll address it down the road.

5ea847c6cfc6bfa74b5663a0f4e91d6f.jpg


24dc885294ffe3d90fd28cb8659c62d1.jpg


cb2237a37232dca94ad090ea980d3389.jpg


It clears... barely

2d840195db0c908103d074ccd21283d5.jpg


This particular spot is proving to be a lil tricky, had to make a lil extra room down here for activities.

0d63af58788c02ce226a6b1be03833cd.jpg
 
Random aluminum work, this part is taking a bit to figure out, first time doing any kind of real work with aluminum.

b53805c413ff53f4c1cc3faca8a67d89.jpg


ea000422744da02edbdb430500828aa3.jpg


ac25a8adce7b3aecf5be7281e4e330fb.jpg


Found that masking tape works pretty good for getting stuff tacked together in the buggy.

b50f0062e08451af496a13c3083835e9.jpg


Got a little further with this thing tonight as well

bdaaa4241cce29827f854dc92188f8a7.jpg


b840995600a6e4abb35ca4c57e2a3ce1.jpg
 
Re: Re: Flatlands #1

ridered3 said:
Glad to see some updates on this build.

The rocker guards/fancy foot cutout with your name cut into it is a nice touch.
Thanks, those took way to long to cut out and will end up getting ripped off at some point.
 
Re: Re: Flatlands #1

FlatlandFSJ said:
Thanks, those took way to long to cut out and will end up getting ripped off at some point.

That always seems to be the case for little details like that, but it's a neat little signature piece.
 
Great to see an actual build thread again with active photo links! Also love to see someone else still using the old school fab techniques.

What ultra bell are you using?
 
twostep said:
Great to see an actual build thread again with active photo links! Also love to see someone else still using the old school fab techniques.

What ultra bell are you using?

Thanks, I enjoy making the little brackets and junk by hand, some say it's not worth it and they are probably right....but it doesn't bother me thumb.gif


It's an older one that we picked up in the forsale section. It's JW's standard th350/th400 ultrabell so we will still need to run the conversion spacer and flexplate.
 
FlatlandFSJ said:
Thanks, I enjoy making the little brackets and junk by hand, some say it's not worth it and they are probably right....but it doesn't bother me thumb.gif

No doubt that some tabs and such aren't worth it but for all of the custom parts what choice do you have unless you've got 10g's to drop on a plasma table. Besides, there is a lot of satisfaction to be had from doing it yourself.
 
Looking good. Is the front sway bar mounted to the front axle and linked to the frame or am I seeing things? There is no good place on my buggy for a conventional installation and I have been considering just that. I haven’t seen it done, but I can’t see why it wouldn’t work.
 
AEH said:
Looking good. Is the front sway bar mounted to the front axle and linked to the frame or am I seeing things? There is no good place on my buggy for a conventional installation and I have been considering just that. I haven’t seen it done, but I can’t see why it wouldn’t work.

Yup, it's attached to the front plate/truss on the upper link mounts. It's been done a few times, screamin' blue had one mounted this way in the front a while back and you'll notice alot of the bouncer guys have started mounting them axle side in the rear as well.
 
onetoncrawler said:
very nice work. :smoke:

Thank you....Dillion is doing a great job!


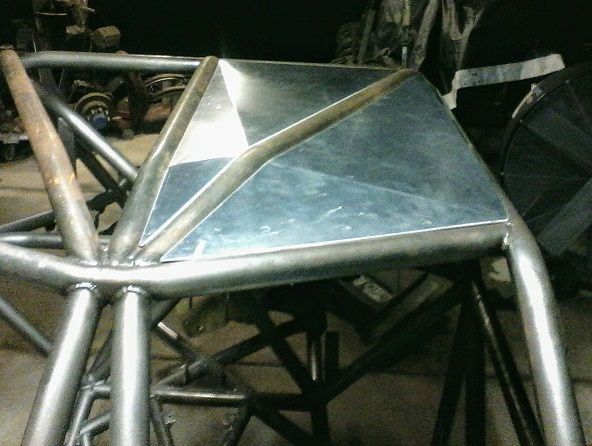
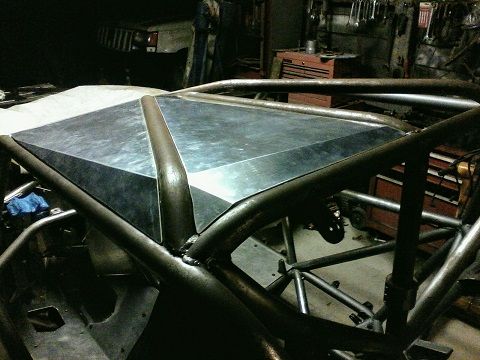
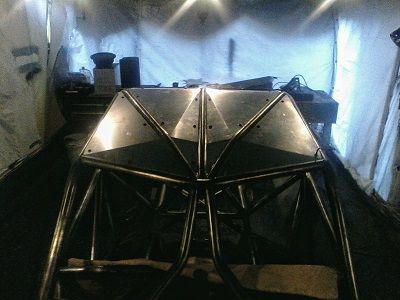
Roof panels are coming together
 

Attachments

  • 99387~3.jpeg
    99387~3.jpeg
    50.8 KB
  • 99404~2.jpeg
    99404~2.jpeg
    37.8 KB
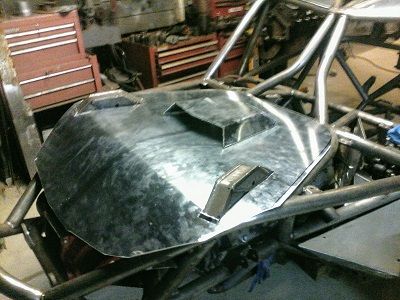
Don't know how this will turn out, but I'm giving the fancy hood thing a shot as you can see from Rays post.

First cut and roll.

8dd124c7ff7db93dfb5313cd4fec2a02.jpg


Little bit closer

28b88f66bea9ef11088fec58fda1ce80.jpg


Fitting it the best I can, some spots are better then others...
d1a7ff7fa42f100e5a98d4cdd69b8334.jpg


Hoping that this works, usually I'd make a cardboard template and use it to figure out the bends

76e3af4e36a03f9189533bb34978f920.jpg


Turned out decent I guess, I left it a bit tall so I could fine tune the angle.

0dec621b01f656c1d2faf2439cb2efaa.jpg


I'm still unsure of how I'm going to attach this lil scoop, I bent a flange into it with the plan of maybe using rivets.. worse case I'll hack the flange off and weld it on there.

89a5a87fe4bce7d2870e86ebc76626ff.jpg


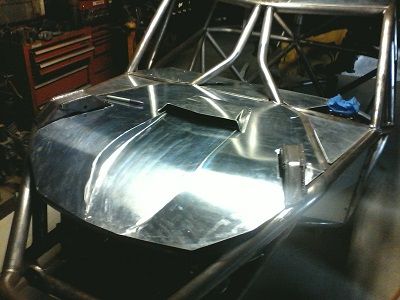
As of now I'm working on laying out the center bit on the hood, it's a bit bland being flat across it,trying to figure out something to break that up. Scoop is down at the right height..give or take a fuzz.

ad94c6741517c45e641e0f31456edc35.jpg
 
Don’t take this wrong, I appreciate the work that went into that hood, the fab is top notch. But I don’t think it fits the build. Just my humble opinion.


Sent from my iPhone using Tapatalk
 
AllGoNoShow said:
Don’t take this wrong, I appreciate the work that went into that hood, the fab is top notch. But I don’t think it fits the build. Just my humble opinion.


Sent from my iPhone using Tapatalk

Hold your judgement for a day or two while I finish it out, it's still pretty far from what it should look like...still to early to know if I'm gonna be able to make it do what I want.

Forbanger said:
I like it

Thanks thumb.gif
 
I think the rivets would look good as a method to attach the scoop, plus would be easier to replace if it ever gets wadded up.
 
valley in center of the hood taking shape....more trimming on the front to fit the tube still but its getting there!
 

Attachments

  • 102747.jpeg
    102747.jpeg
    30.4 KB
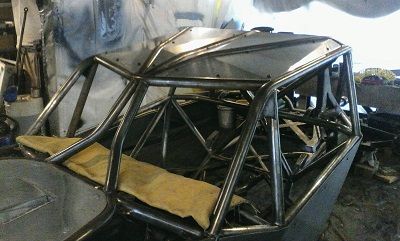
moved the chassis to the paint room and Dillion finished up the roof
 

Attachments

  • 104457~3.jpeg
    104457~3.jpeg
    21.1 KB
  • 107967~2.jpeg
    107967~2.jpeg
    23.6 KB
  • 107972~2.jpeg
    107972~2.jpeg
    26.4 KB
Looking great! I can appreciate all the hand made effort in this unit.

Enjoy learning tig, it'll change the way you look at all forms of welding.

Keep hammering on the aluminum, tighter the joints the better... just need a bead roller now to spice things up????.

Matt Cutler

Sent from my SM-G892A using Tapatalk
 
mcutler said:
Looking great! I can appreciate all the hand made effort in this unit.

Enjoy learning tig, it'll change the way you look at all forms of welding.

Keep hammering on the aluminum, tighter the joints the better... just need a bead roller now to spice things up????.

Matt Cutler

Sent from my SM-G892A using Tapatalk
Thanks man, it's been a learning experience for sure.

A bead roller is on the list for sure. I scored a couple decent sized arbor presses the other week, going to pick up a set of shrinker/stretcher jaws for future sheet metal work as well. thumb.gif

AllGoNoShow said:
The roof looks great.


Sent from my iPhone using Tapatalk

appreciate it :dblthumb:
 
Steelit...

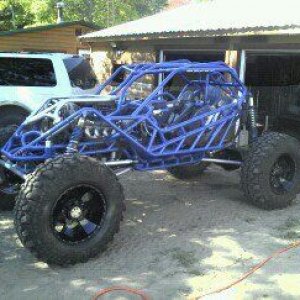
My pics won't really do justice to the color or finish, I'm sure Ray will post a few next time he stops by.

Prepped the chassis with wire wheels and scratchpads, no one wants to see pics of cleaning tube..so we will just get into it.

It's been a bit chilly lately so a slight preheat in the sun for good measure...

7a069591c126a7bd7fea309bc7a347fd.jpg


Spraying it out of a cheapo harbor freight gun. It's worked well enough, it's a bit thick for the standard filters.

I'm sure they make a different filter that would work...I found taking it out works just as well though.

ada11591e564f94fe6b3f392a917ec24.jpg


e67535c0d1de7a5ab0b7222065dede24.jpg


90f36d1018ecc8e84c645a3b364a4cea.jpg


Stuck a couple bolts in the lower link mounts to hold it up while I put the final coats on it.

ef22bbc428879d6e27e86c9db8d31f7d.jpg


6312199edaf3455fb04a913382afd0bd.jpg


a76b51ad850b7fd9d644609410ea2e2c.jpg


614123d7bc792565eb7b9f9ab98e1345.jpg
 
Back
Top