• Help Support Hardline Crawlers :

Juggy Rehab

hokie_yj

Well-Known Member
Joined
Mar 23, 2012
Messages
1,425
Location
Surgoinsville, TN
I should have started a thread for this thing a few weeks ago, but I figured I'd throw one together now.

I know I have another project sitting in the shop that I should be working on. If you're not familiar with it here's the thread for it. http://www.hardlinecrawlers.com/forums/index.php?topic=23417.0 I've been working on it for a few years now, but honestly had gotten burnt out working on it and never getting to ride. I had a perfectly good, running buggy when I started that project but I neglected it focusing all my time and money on the build and eventually ended up selling it. Looking back that was a mistake. So a couple months ago I got the idea to go buy a running rig so I could get out and wheel and hopefully get the motivation back to finish the single seater.

I saw this rig posted here on Hardline and decided to go look at it since it was only about 1.5hrs from me.


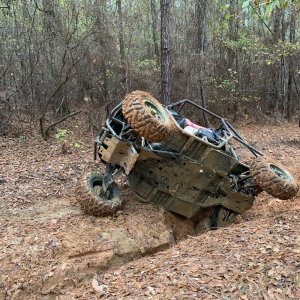
The plan was to just go look at it, but out of excitement for a new rig I ended up making a deal with the guy that day. He actually even hauled it home for me. I knew when I got it home there would be a few things I would need to fix, but the deal was good enough that I was ok with it. Once I got it home I found more issues than I originally thought though. I'm not knocking the seller at all though. He's a stand-up guy, and I've talked to him a few times since I got it home. There were just things on it that I wouldn't have been comfortable with taking it out. I just don't like being that guy always breaking down on the trail all the time.

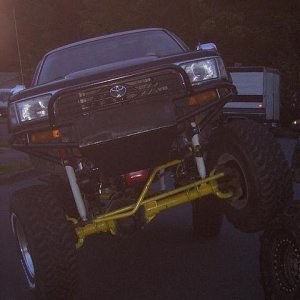
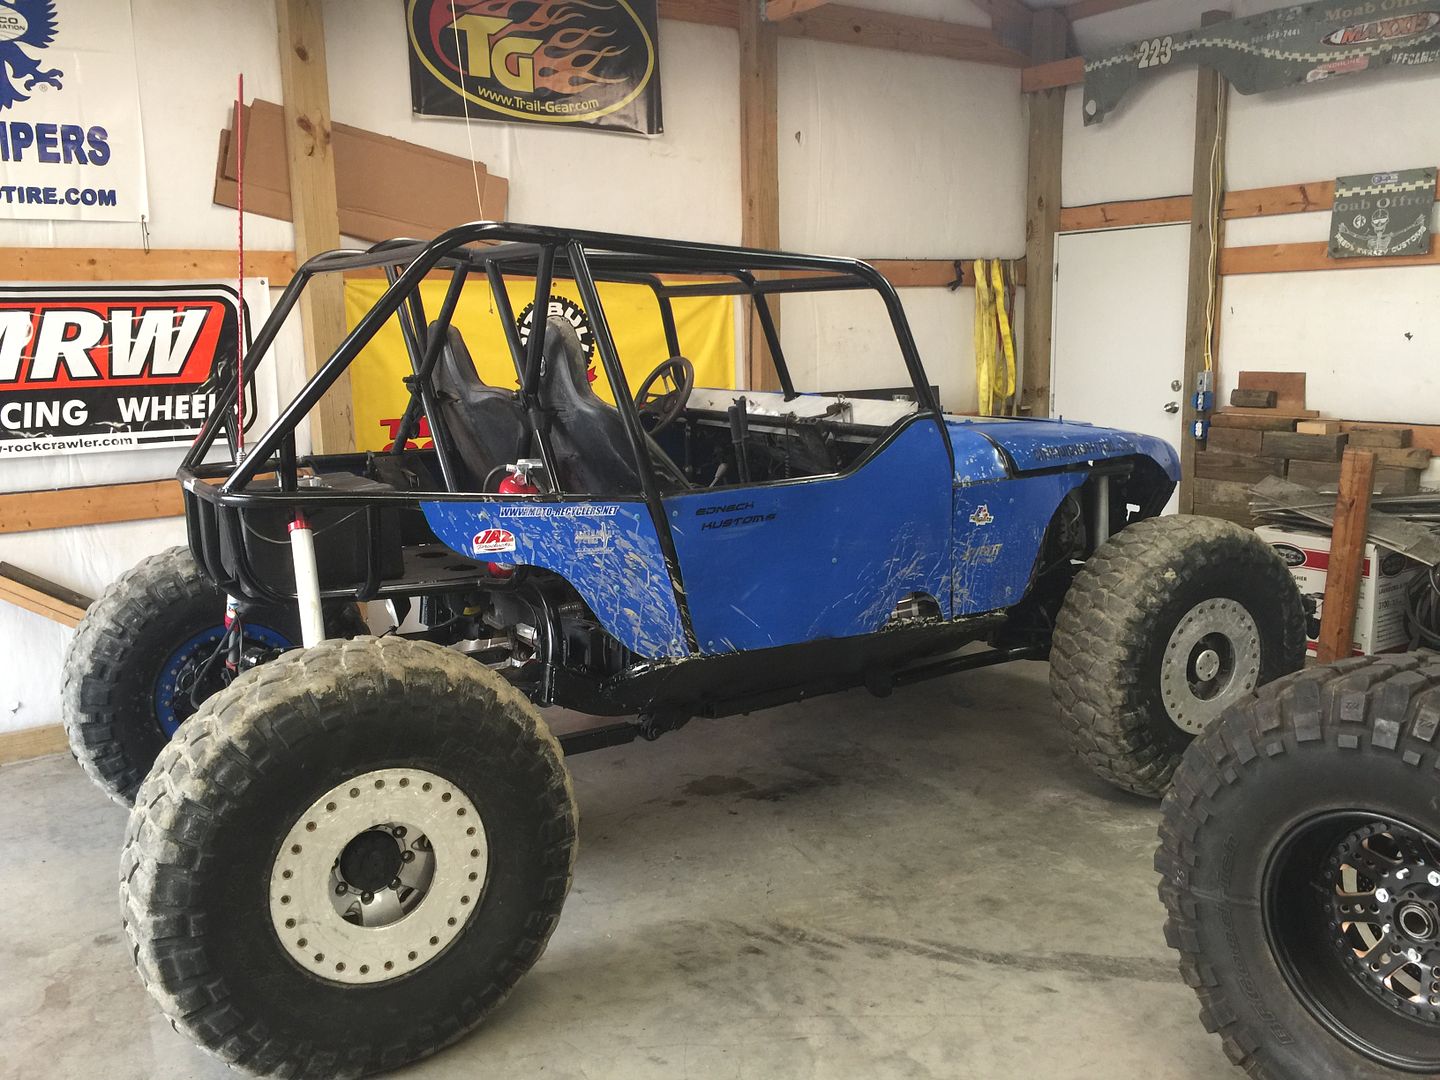
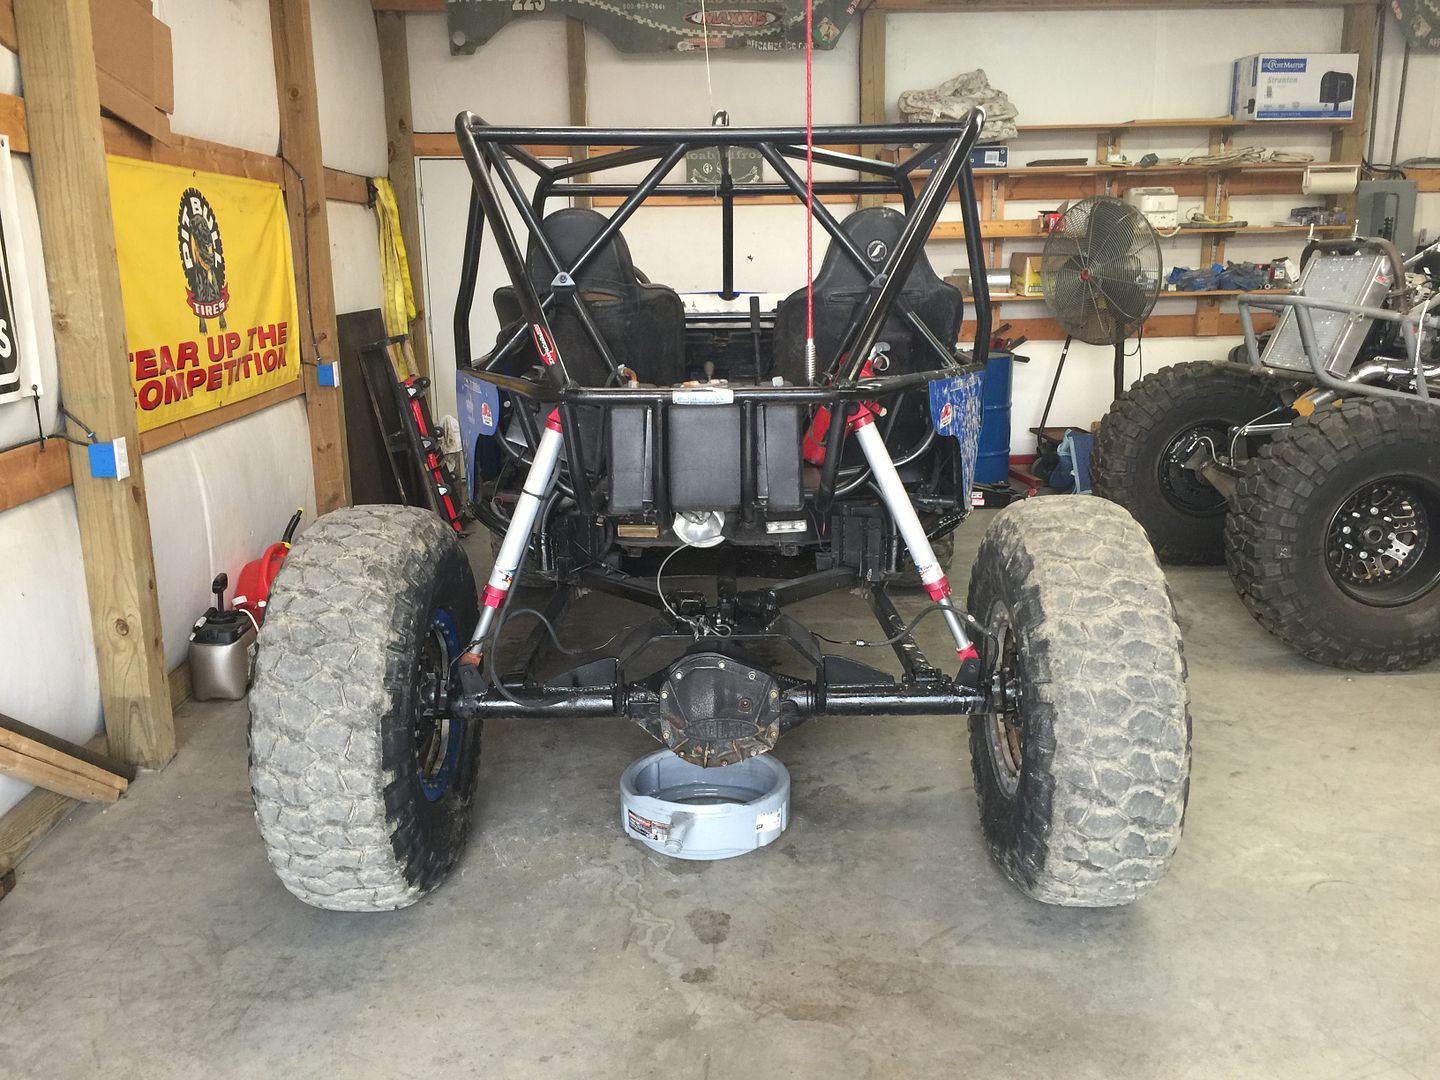
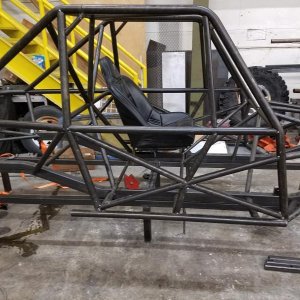
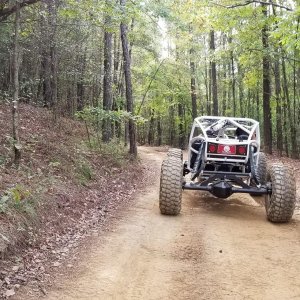
It is what's left of a YJ, I don't remember exactly what year.
4.0/AW4/D300
60s F/R 4.56s welded front and spooled rear
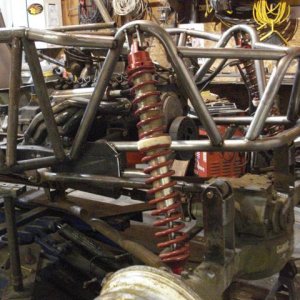
4-link F/R with 14" air shocks
 
The first issue that needed to be addressed was the seat mounts. The PO had installed a 3rd seat for his young kid. And in order to do that he had cut out part of the rear seat mount tube and made some "interesting" legs for the seats. ;D


I pulled the seats out and gave them a little washing.


Here you can see what was left of the seat mounts.


I got out the plasma and cut out what was left of the rear tube and installed a new piece.


I also added new mounts for the harnesses.


The PO told me when I bought it that it needed a better cooler for the transmission so I mounted a cooler with a fan under the passenger seat.


And I remounted the shifter with a bracket I got from WOD and I made a bracket off of it to mount the RAD shifter for the AW4.


Next I moved the front end. What started as swapping a stuck caliper on the driver side turned into finding a lower kingpin bearing that didn't exist anymore. So that turned into a complete axle rebuild.

While I had the knuckles off I wanted to do something to help reinforce the stock knuckles because I've seen too many broken. I started with a piece of 1.25"x.25" dom and a long 3/4" bolt in t he stock steering arm.


And then cut some gussets to tie it into the hi-steer arm.


All welded up. I also cut a piece to go around the tube and tie it into the top of the arm.


Then did the same for the other side.


Before the hi-steer arms were held on with just 1/2"-20 bolts. While I was at it I decided to upgrade to Grade 9 studs and tapered nuts. (lug nuts) I bought a set of 60* chatterless countersinks from McMaster-Carr and used them in my drill press with the Rogue Fab reduction kit. Being able to turn them at 37.5 RPM made it really easy.


The front axle had Yukon stubs and short side inner, but the long side inner and both joints were Spicer. I ordered a new Yukon long side inner, and also found a good deal on a set of unused CTM joints.


Also both inner axle seals were leaky so I pulled the carrier and replaced them, and also added outer tube seals from Seals-It.


Then I started putting the outer knuckles back together. Both sides got new lower kingpin bearings and seals, and ECGS bronze upper kingpin bushings and seals. I also went back with the Crane kingpin spring eliminators instead of the factory springs. I did have to trim them down slightly to work with the homemade hi-steer arms.


I also put all new bearings and seals in the hubs and spindles, and replaced the cast Solid 60 cover with a Barnes4WD cover.


Next I moved to the rear axle. It had 35 spline Yukon shafts, but the PO had broken one. He gave me what was left of the shaft, and luckily he had bought it from a shop that I've dealt with quite a bit before and they were nice enough to warranty it for me.


And I also swapped to a Barnes4WD cover on the rear too.

 
The next item on the agenda was to clean up the wiring that was honestly just a mess. It needed a battery when I got it. Luckily I had a DieHard platinum and a RuffStuff battery box sitting in the shop that I had bought for the single seater but didn't use.


And after seeing it recommended in a couple different threads on here I picked up this QuickCar switch panel.


I spent several hours one day with a meter, some test jumpers, a roll of masking tape, and a sharpie tracing and identifying wires and figuring out what I could and couldn't get rid of.


Here's the scrap pile I ended up with.


I added this 150A circuit breaker and distribution block as well as a battery disconnect switch all from Blue Sea Marine. Everything but the winch goes through the disconnect and circuit breaker. The winch leads go straight to the battery. All of the battery cables I made from 00 welding cable. I also added my own relays for the radiator fan, trans. cooler fan, and headlights.


Here's a video of the first start-up after re-wiring.


And I also threw on some led rock lights that I'd had on the shelf in the shop for a long time.

 
While I was waiting for a couple of parts for the wiring to come in I installed some new 5 point harnesses, some new hood pins, and cut down a TJ windshield channel and screwed it to the cage so I could use a Safari top as a roof.


Re:

Good write up! I should send my juggy down to you and you can rehab all the dumb **** I did to it when I built it and had no clue what I was doing.

Sent from my SM-G930T using Tapatalk
 
I went ahead and bought the parts to build new tie-rods for the front too. The heims in the old tie rods were pretty worn, and on the ram end instead of using tube adapters they welded the heim straight into the tubing. I'm not sure what that was all about. :wtflol: 
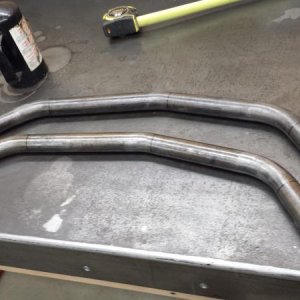
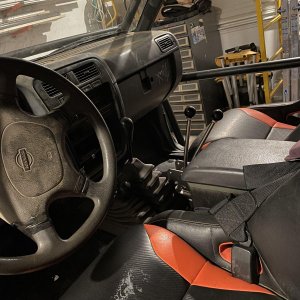
the ram is pretty offset on this axle so the driver side tie-rod is really short, only about 2" of tube. I had ordered the large hex tube adapters from Barnes4WD for both sides but they were too long to work on the short side. So the short side just got standard tube adapters.


When I got this thing it had some well worn 39" reds on aluminum wheels with some weld-on beadlocks. None of them held air real well, and I'm really just not a big fan of aluminum wheels with my driving style, (or lack of). I found this set of used Stazworks steel double beadlocks on a FB group in Phoenix, AZ. I had them shipped here through Fastenal.


Freshened the wheels up with a little spray bombing.


For tires I'm going to go ahead and throw the 40" Treps on it that I bought off here a couple months ago. When I bought them I thought they might end up on the single seater, and they may one day. But for now they're going on this thing.


I've got one wheel and tire assembled so far, but I didn't have much time this weekend. I should have the other three mounted this week. Once I got the first one together I went to bolt it on the front end and the center hole is just a little too small to fit all the way on the hubs. It fits fine on the back, but the front hubs are Dodge DRW hubs that have been machined to SRW. It doesn't need much, probably about 1/16" or so. I think I'm just going to open them up a little with a stone on a die grinder.


That's pretty much where I stand on it right now, just have to get the other three tires mounted and do some bleeding on the brakes and then go beat on it and see what I can tear up.
 
Re:

onepieceatatime said:
Good write up! I should send my juggy down to you and you can rehab all the dumb **** I did to it when I built it and had no clue what I was doing.

Sent from my SM-G930T using Tapatalk

Haha! Thanks man! This one still has plenty of issues to address, but I hope I've got most of the major ones for now. I just want to have some fun now! booyang
 
Re: Re: Juggy Rehab

1TONTJ said:
I never get tired of reading threads like this. I love makeovers and fixer uppers.
You need another build thread yourself dude!

Sent from my SM-G930T using Tapatalk
 

Latest posts

Top