• Help Support Hardline Crawlers :

surgery

Figured you could use those pics Drae for ideas. :awesomework: I took the opportunity to get the fairlead back down where it belongs instead of where ARB thought it should go.

Yes, thank you, that bumper is NOT set up to accept a hawse, I'm trying to figure out how to mount it as those middle holes open up right into a shallow notch on the winch, if I use them as is I'm going to have to grind down a bolt head and run the nut on the outside. Seeing those pics I have to go back and look mine over, hadn't thought about opening it up lower like that.

What's the piece you added above your hawse, just a stand off in case you nose into something?
I cut the slot lower even with the bottom winch bolts and closed up the upper portion. I also added that curved piece behind the fairlead for support. The piece above is just to give a little strength back and break up the big flat surface look, the old fairlead mount doubled as a gusset of sorts.
 
So does the winch still mount to the face of the bumper? Are you using the fairlead bolts as the lower two mounting bolts for the winch itself? (do you have a build thread that I could be reading all this in?)
 
So does the winch still mount to the face of the bumper? Are you using the fairlead bolts as the lower two mounting bolts for the winch itself? (do you have a build thread that I could be reading all this in?)

Yes, yes, and no. Just pics. Mine's an XD9k too.
 
So here are the pics of the shifter assembly mocked up, need silicone and locktight etc for the final assembly.

atlasbuilt1.jpg

atlasbuilt2.jpg


And here are the pics of the transmission adapter that I've got. When you flush it up to the case, there's a gap inside. Given the inner/outer surfaces are machined, and the minimal overlap/engagement of these surfaces, my gut tells me something's not right (wrong adapter?). I hope I'm wrong, and seeing that the case surface isn't flat and the inner adapter surface is, maybe they're not supposed to be in direct contact, but the lack of overlap of the outer surfaces seems odd... :mad:

atlasgap5.jpg

atlasgap1.jpg

atlasgap2.jpg

atlasgap3.jpg

atlasgap4.jpg
 
I think you're OK. If you're still not sure, just email those pics to AA and ask them to take a looks.

The case itself is flush with the adapter along the ring (where the bolts are) and that's where the strength is. That's also where you'll bolt it to the tranny. That gap is by the front bearing support/seal area. NOT the case itself.

Anyhow - that's how it looks to me and I'd think its ok.

Tony
Apparently you're sorta right, after a phone call to AA this am (coupled w/emailed pics for them to look at real time w/me on the phone) they said that's correct. The spacer is a "universal" spacer. The flat inner surface is machined to match the seal retainer on the 2spd atlas. The 4spd has the reduction box which has a different seal retainer (tapered outer face vs flat). The tech said as long as there is "some" engagement to keep the spacer centered, it should be a non issue b/c of the 6 studs. Now why they don't build the seal retainer for their reduction boxes the same as the ones for the atlas 2spd, I don't know, but you'd think if they're going to build one universal spacer to save money, they could make just one seal retainer that matched...:rolleyes:
 
hydro assist cooling question...

Cost aside, should a standard power steering fluid cooler be sufficient (a lot of people I've talked to say yes) or should I consider one w/it's own fan?
DER-13212.lrg.jpg


vs

der-15820-2-lrg.jpg
 
Alright, no input on coolers, what about harnesses?

I've decided on a pair of the Mastercraft Baja RS reclining suspension seats. Full black (duh) with adjustable headrests. Any input on harnesses? Bolt in vs snap in? I'll be reworking my internal cage so there are attachment points for the harnesses, but is there an advantage or disadvantage to either of the two designs?

5ptbolt.jpg

5ptclip-in.jpg
 
I say bolt in since I see no reason why you'd be taking out your harness consistently.

Plus, I suppose the snap ins would be easier to steal...
 
I say bolt in since I see no reason why you'd be taking out your harness consistently.

Plus, I suppose the snap ins would be easier to steal...

Says the man w/the doorless open top rig. :fawkdancesmiley: oh wait...:booo:
 
pics from friday night...

pulled the bumper
frontbumperoff1.JPG


frontbumperoff2.JPG


then I saw the pinch seams at the back of the front wheel well and they were bugging me, time for the BFH = flat as can be (hard to tell from this pic + black paint), I'll cut out the lower portion when I do the rocker replacement
pinchseam1.JPG


pinchseam2.JPG


when dealing w/the LCA mounts, sawzall is your friend
LCAmountoff1.JPG


then time to do a little clean up w/the grinder
LCAmountoff2.JPG


LCAmountoff3.JPG


LCAmountoff4.JPG


while mocking up the stinger I realized my offroad lights will be directly behind it, not to mention the DS one would be blocking access to the clocked winch handle, so off they came to be relocated in a yet to be determined location...
lighttabgrind1.JPG


lighttabgrind2.JPG


there were some lower mounts that I've never used, they probably could have stayed, but I was having too much fun w/the sawzall :redneck:
lighttabgrind3.JPG


cut out the TNT pieces to go around the clayton crossmember
TNTcut1.JPG


marked where to cut the TMR plates, the sawzall blade was dull as sh1+ by this point, so I'll do these cuts w/the jigsaw later, first pic is where it will go around the TNT kit, second pic is where it'll go around the THOR bumper plates
TMRprecut1.JPG


TMRprecut2.JPG


the bracketry for the ARB bumper appear to be just wide enough that I can work the THOR plates in b/w the brackets and the unibody itself, I cut a channel down the angle of the bracket and will work the THOR plate to fit in this channel and line up w/the factory mounting hardware, this will give me multiple opportunites to weld the plate to the bracket to ensure a solid front end
THORbumper2.JPG


test fitting the THOR plates, more work to be done...
THORbumper1.JPG


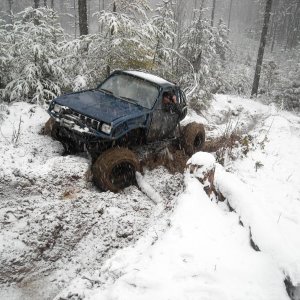
last project for the night was clocking the winch so the handle was on the top instead of the bottom, bury the front end in mud once and you realize having the handle on the bottom is quite inconvenient, big hole saw for the first cut, then tack welded a piece of flatbar across the hole (my buddy finally gave up the welder for a sec) to drill into to do the second hole saw cut, a little touch up w/the grinder and I have nice access to my new handle location
winchhandle1.JPG


winchhandle2.JPG


winchhandle3.JPG
 
A big thanks to John at Auburn Car Repair & Offroad for a blingin' paint job on my front axle. (note to self, never leave parts w/friends and leave the state) :mad: :haha:


IMG_1536.jpg

IMG_1537.jpg

IMG_1538.jpg
 
A big thanks to John at Auburn Car Repair & Offroad for a blingin' paint job on my front axle. (note to self, never leave parts w/friends and leave the state) :mad: :haha:


IMG_1536.jpg

IMG_1537.jpg

IMG_1538.jpg


Priceless double dog dare you to wheel it that way:haha::haha::haha: oh yeah, and pics that you wheeled it with that cute saying - or it didn't happen!
 
Top