SXOR single seater build

Hardline Crawlers - Rock Bouncer Builds, Tech & Off-Road Trail Talk

Help Support Hardline Crawlers:

I got a little more done today. I got all the brake lines ran on the axles, I'll do the plumbing on the chassis later. The brake lines are all .25" stainless tubing and braided hoses with swage type compression fittings. I used RuffStuff brake line tabs to mount everything.


After that I cut a fairlead mount out of some flat bar and tacked it in place.


It's certainly not a lot of progress, but it's a couple things to mark off the list.
 
It's been a really long, really busy month at work. So I haven't had much time to even touch this thing. But at least all the OT has allowed me to order more parts. Over the last few days I've had a little time to work on a few small things.

LS6 intake installed.


New oil pan installed.


Orbital, column, and steering wheel mocked up.


The lighting in that picture is horrible, but you can kinda see the new fuel cell sitting there too. I decided to ditch the RCI cell, and had a custom ATL cell built. It's a 8 gallon cell with an in-tank Bosch 044 pump feeding from a trap door surge tank. It was pricey, but man is it nice.

I also got the Radiator in from PRC. I highly recommend them if you need one built. I ordered it on a Friday afternoon and it was built and shipped by Wednesday. The quality is top notch as well.

Once I got the radiator here I decided I didn't like it mounted over the engine so I decided to put it back down in front of the engine. So far I just have the lower mount mocked up. I split a short piece of 1.75" tube to saddle the 1.5" and welded on a piece of 2" flat bar to support the bottom of the radiator.


I still have to bend some tube to protect the radiator and build the top mount off of.

I also worked on the shifters for the Atlas. With the the standard shifters the levers were almost behind the seat.


I cut the levers off short and used a couple short pieces of 1/2" sch. 80 pipe as a sleeve for the new lever.


I bent and threaded a couple pieces of 1/2" for the new levers, and added the pistol grip handles just because.


New shifters installed. They're easy to reach now, and I think the extra leverage will make the Atlas easier to shift.


I know this is a pretty boring update, but I hope to get some more stuff knocked out this weekend and next week.
 
Re:

That thing is starting to look like a buggy!!! Looking good man!!

Sent from my Z750C using Tapatalk
 
Today I worked on the radiator protection/top mount. This was my first time ever bending tube. So it was slow going. No better time to learn than in the middle of a build I guess. Lol. Love the RogueFab bender so far though.


I just bent a simple hoop to protect the top of the radiator and added tube flanges so it can be removed to pull the motor.


Made the plate to clamp the top of the radiator from some 2" flat bar and some shock tabs I had here in the shop.


I had to make a couple tabs to attach the top plate to the tube.


Finally finished.


The radiator is isolated with 1/8" silicone rubber between the top and bottom mounts, but it's still a little loose. I need to find something a little thicker that will still compress and hold it tighter. Any suggestions?
 
Look good man! I can't wait to see this thing wrapped up!


Sent from my cellular device.
 
As an Amazon Associate we earn from qualifying purchases. Product prices and availability are accurate as of the date/time indicated and are subject to change.
Great rig! Dude that lived around Bham had an SXOR chassis that he raced in some events. Not sure what he ever did with it
 
Thanks man! I appreciate it. I'm just a hack compared to most guys on this forum but I'm trying not to screw this up.

I've been in love with SXOR chassis ever since I saw the photo shoot for Randy's with the smokin hot redhead. Maybe it was mostly the redhead though. Lol.
 
Today I got the fuel cell mount built. I added a piece of tube between the shock mounts to mount the front of the brackets on.


I made the brackets out of some 1" angle and mounted them to the bolts holding the can together. I used the same rubber I used on the radiator between the brackets and the top of the cell and between the cell and the floor.


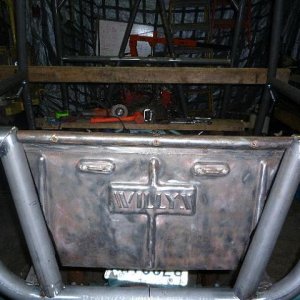
I also started working on the interior panels. I'm using 1" thin walled tubing for the framing, and probably will use 1/8" aluminum for the panels. I want to make them all easily removable to make it easier to work on. It's definitely going to be snug inside for a big guy like me, but it's still comfortable.


looks flashemifyougotem!!

Are you planning on skinning the "passenger" side of the interior with Aluminum? Looks like that would cut down on visibility a lot.
 
Yeah, hopefully it will at least give a small layer of protection between me and the drivetrain if something does go all to hell.

I don't think it will affect the visibility that much, the body skins wouldn't let you see much through that side either.
 
I just had a couple hours to work on this thing today. I made a couple tabs and got the light bar mounted. It's a 20" flood/spot combo from TrailWorthy Fab. I started to bend up some tube to protect it, but I ran out of time.


Lov'in it!

What's the wheel base at?

Also how wide is the chassis in the bars where the seat and T-case are at?

I'm building a front engine single seater and just trying to compare it to yours. I'm not as far along as you are. :-[
 
Thanks man! Wheelbase is about 105" and the chassis is just under 41" wide at the seat. I am going to add a 1.5"x.250" wall slider on the bottom of each side so that will add 2-3" per side.
 
I've been off work this week so I finally got to work on this thing a little bit for the first time in a month. I've had a lot of other stuff to do so I haven't made as much progress as I'd like though.

I cut and moved the tube that was hitting the right front shock when it was flexed out. The joint is slugged with 1.25" tube.


Then I added some reinforcement to the chassis side track bar mount and made it double shear. Before it was just a bolt threaded into a bung in the chassis.


Most of my time this week has been spent redoing my screw ups though. I had to cut all the drivetrain mounts and angle everything toward the drivers side a little more. Luckily I had only tacked everything. I got in too big of a hurry the first time around and didn't leave enough room for the driveshaft. It's still SUPER tight, but I think it will work now. After I got everything relocated I bent up a skid plate for the engine. I tied it into the motor mounts and used tube flanges to make it removable.


Hopefully I'll be able to get a little more done this weekend.
 
Got a little more done today. I got the passenger side header and "muffler" fitted up. The headers are OBX turbo headers. I cut off the v-band flange and tacked on a 30* bend and Vibrant Performance 3"x5" race muffler. I have a feeling this thing is going to be a bit loud, lol. I added the miter cut on the end just for the heck of it. Also added a bung for the O2 sensor. Everything is 304 stainless and I plan to have it all ceramic coated.


Here you can see what I'm up against on the drivers side. I had to pretty much cut the whole collector off just to get the header bolted up. I'm still trying to figure out exactly what I'm gonna do here.


After I hit the wall on the exhaust I moved on to finding a place for the oil accumulator. I used some trick tabs with the threaded insert to mount it. I still haven't decided whether or not to run a solenoid valve off the ignition for pre-lubing, or just run it with no valve at all. Any opinions about that?


If your gonna skin it back there cut the bar out and angle it the other way. If not prob have to do other side to match. Cut it out get header on and make something work.

Toddy
 
Yeah, I wish I would have done that before I cut the header up. Just another learning experience I guess. It may come down to buying another collector and going that route.
 
Back
Top