You are using an out of date browser. It may not display this or other websites correctly.
You should upgrade or use an alternative browser.
You should upgrade or use an alternative browser.
Toy Story
- Thread starter Maverick26
- Start date

Help Support Hardline Crawlers:
zukkev
Cornfuzzled yet again...
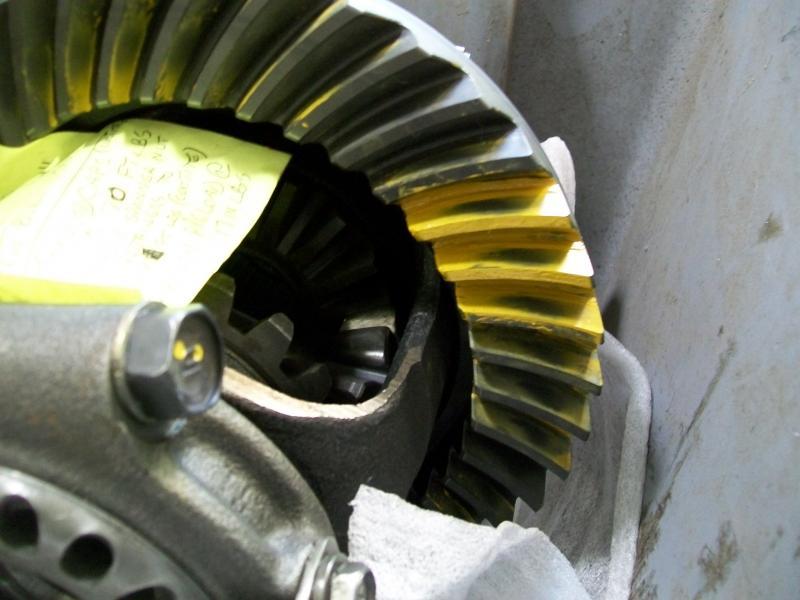
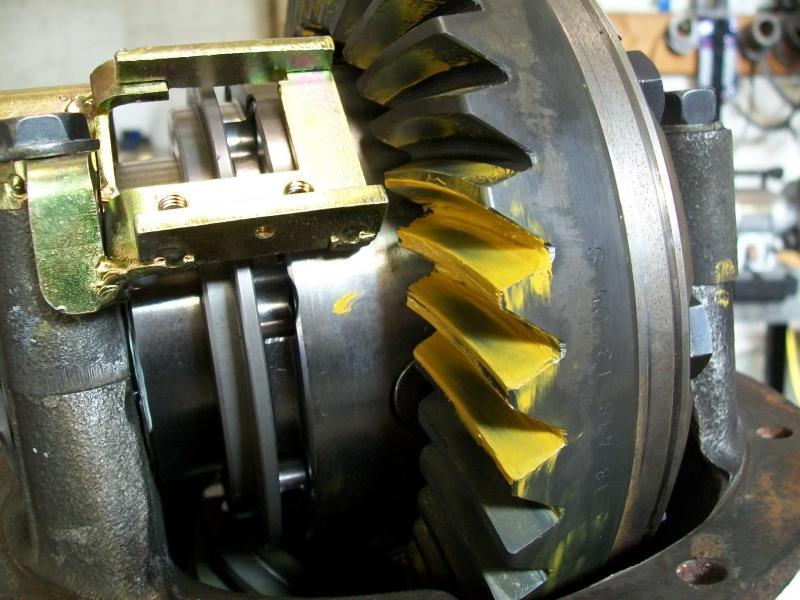
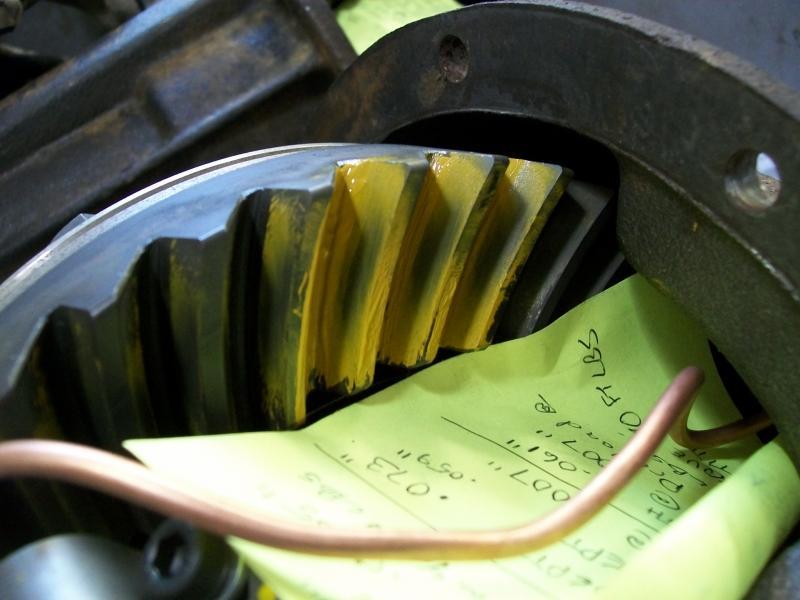
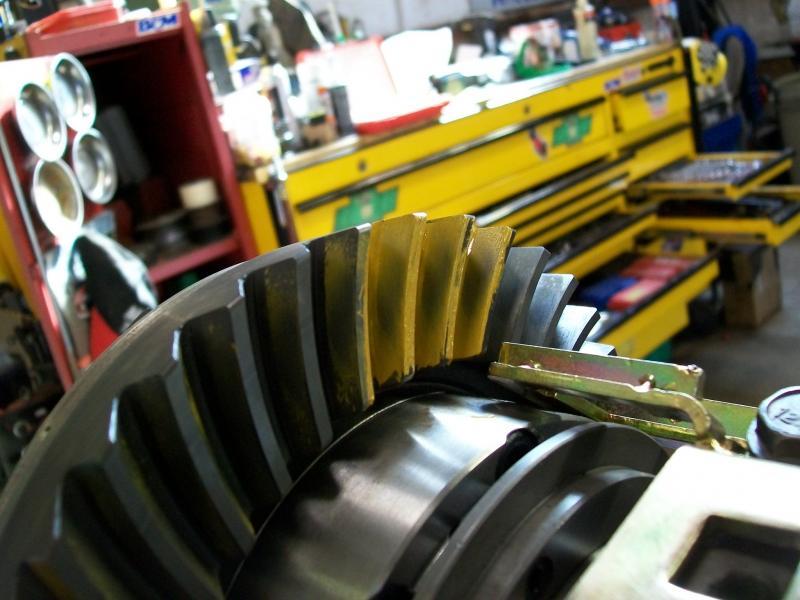
zukkev
Cornfuzzled yet again...
Locker has been leak-checked and is good to go...:awesomework:

Mark m.
Well-Known Member
Throw that thing together and come to walker sunday.

Maverick26
As iron sharpens iron...
Locker has been leak-checked and is good to go...:awesomework:
Kev you rock man! Thanks a lot, this really puts my brain at ease. See you monday!
Throw that thing together and come to walker sunday.
Not this weekend Mark, I got a new dirtbike to ride over east. Im pickup up these 3rds monday and then Ill start slapping the yota together. More to come! Ill be out with you guys soon.
zukkev
Cornfuzzled yet again...
Not a problem Nick! :awesomework: Glad it was caught before they got ran! They'd have made it about 20 miles before chewing up to nothin'!!! :haha:
Enjoy your weekend, and be safe brutha! :cool:
Enjoy your weekend, and be safe brutha! :cool:
zukkev
Cornfuzzled yet again...
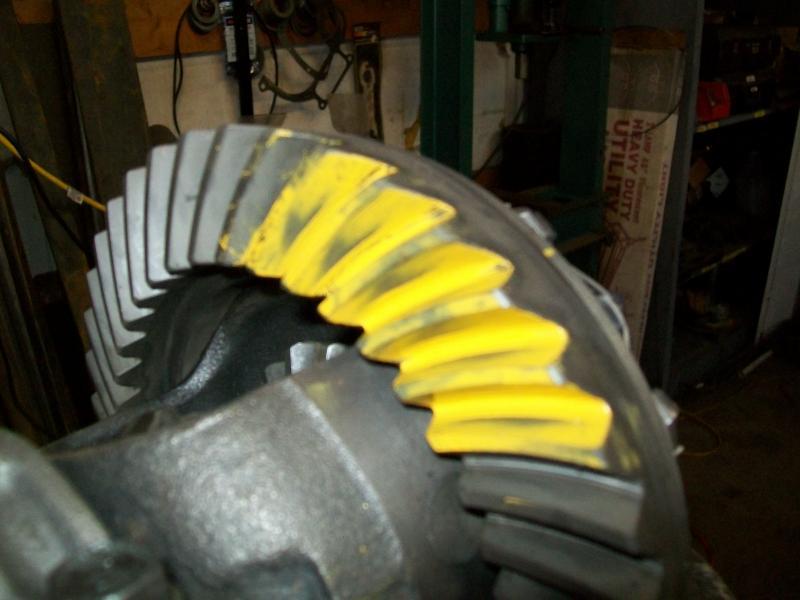
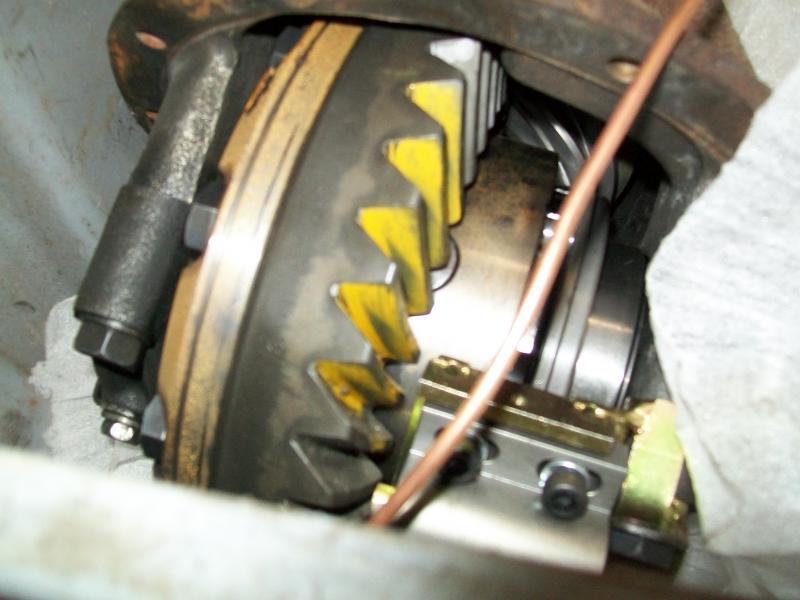
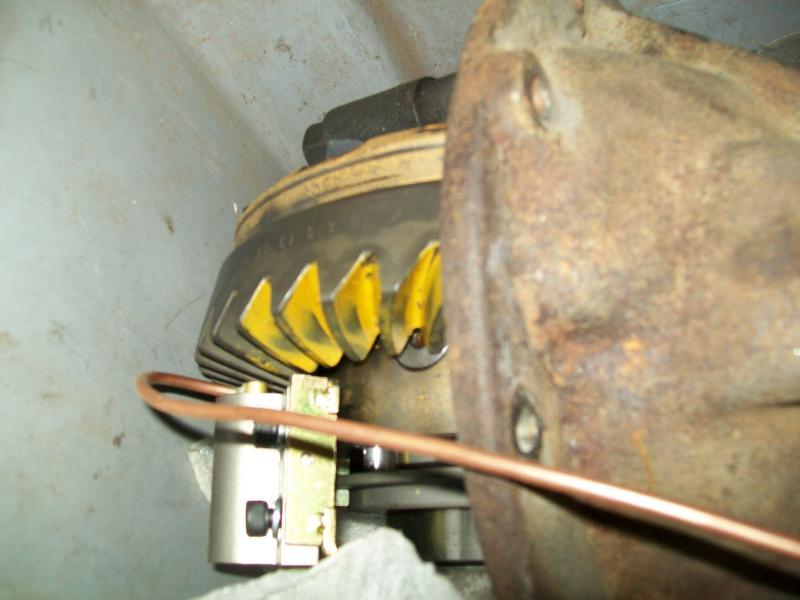
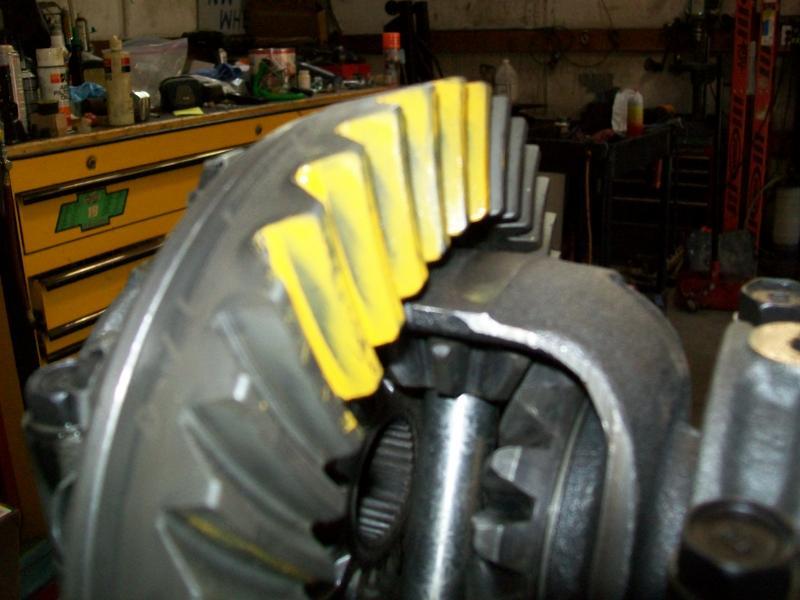
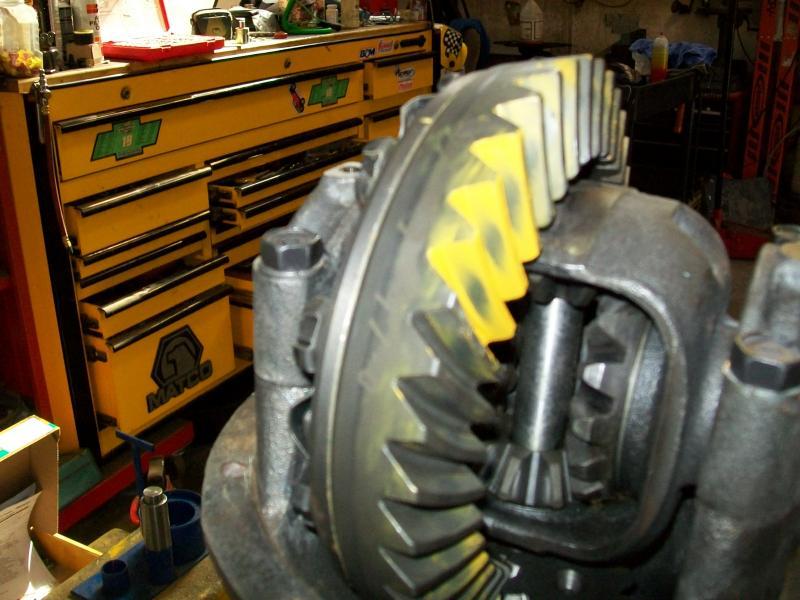
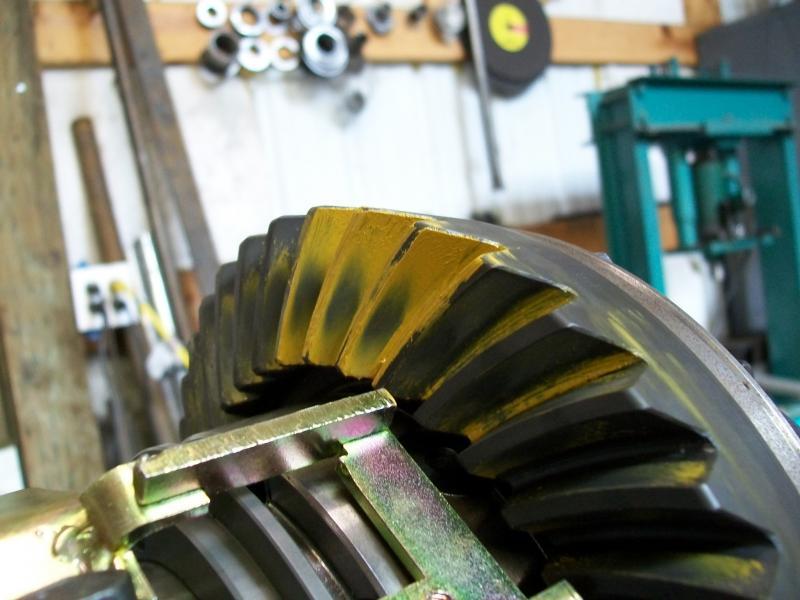
Well, I took a painted picture, studied it, took **** apart, measured, adjusted, and reassembled, torqued, and rechecked with a new painted picture!!! :haha: :fawkdancesmiley:hijack:
Can you tell how you accomplished this Kev?
for the dumber of us :)
cheers
Naw, If you look at the before pics, the paint had a very sharp line in the valley of the gear teeth, with an arrow-like pattern pointing outward. In laymen's, if the 'arrow' or 'D' pattern is pointed out (or away from the valley), the pinion needs to move out (it's too deep)...if the 'arrow' or 'D' pattern is pointed inward, the pinion needs to move in (it's not deep enough--you've heard this before, right!? :nutkick:) The amt changed is somewhat of an educated guess based on original painted pattern and experience.
...Pretty simple, even for dumber folks like us! :haha::awesomework:
Last edited:
Maverick26
As iron sharpens iron...
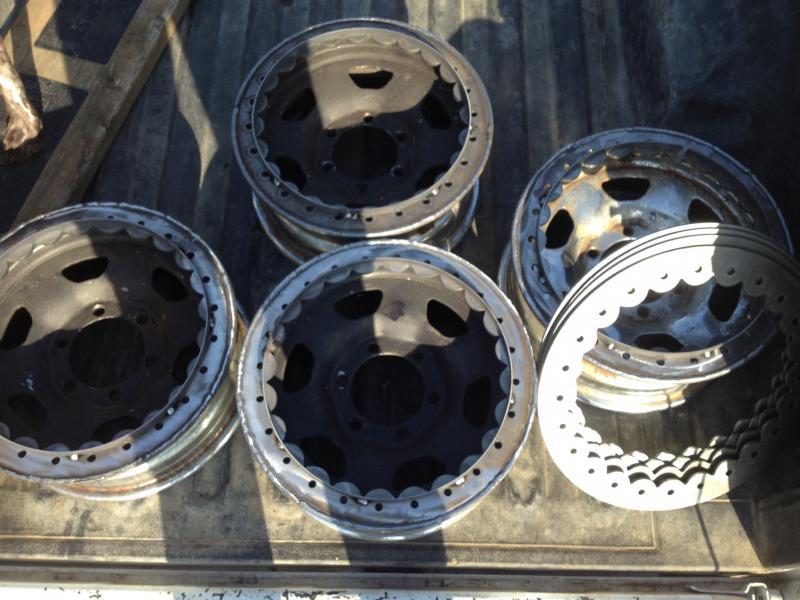
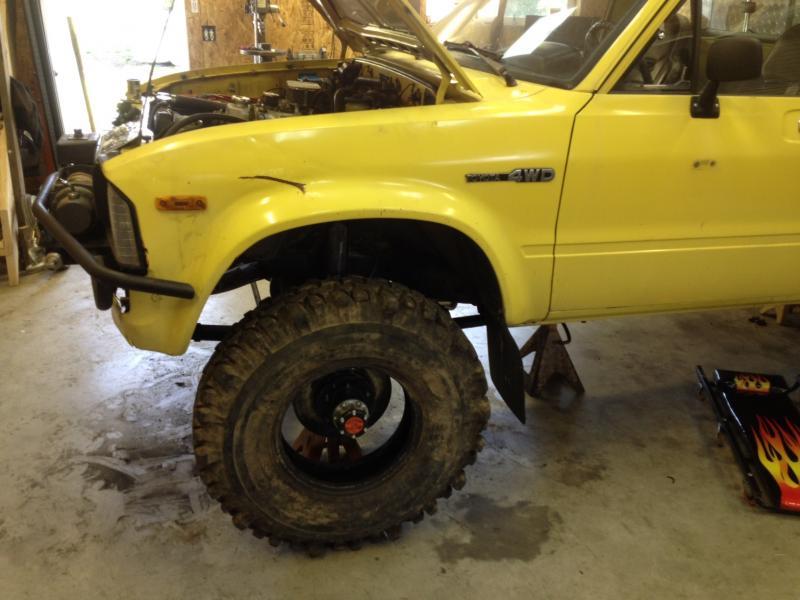
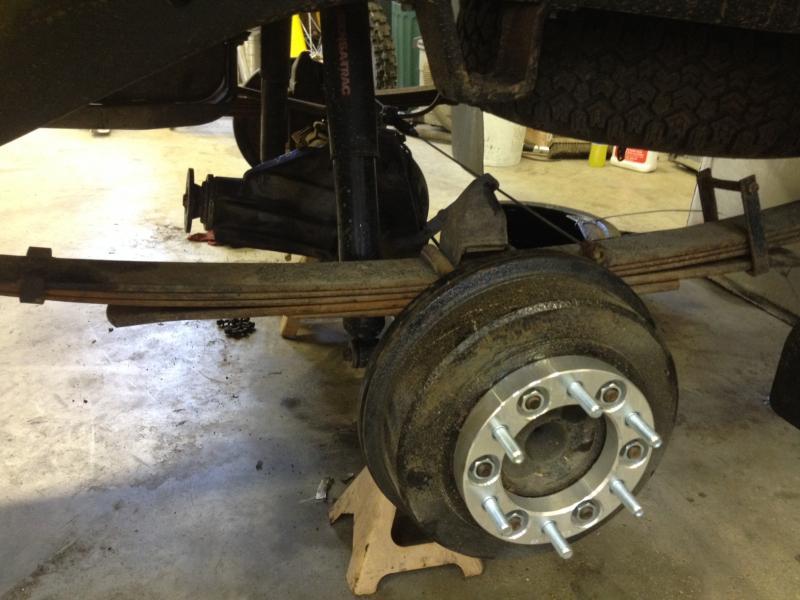
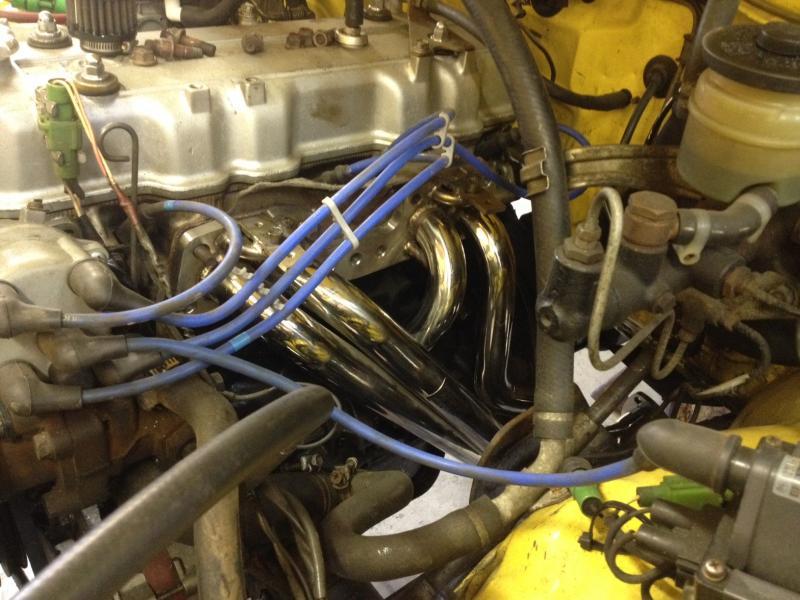
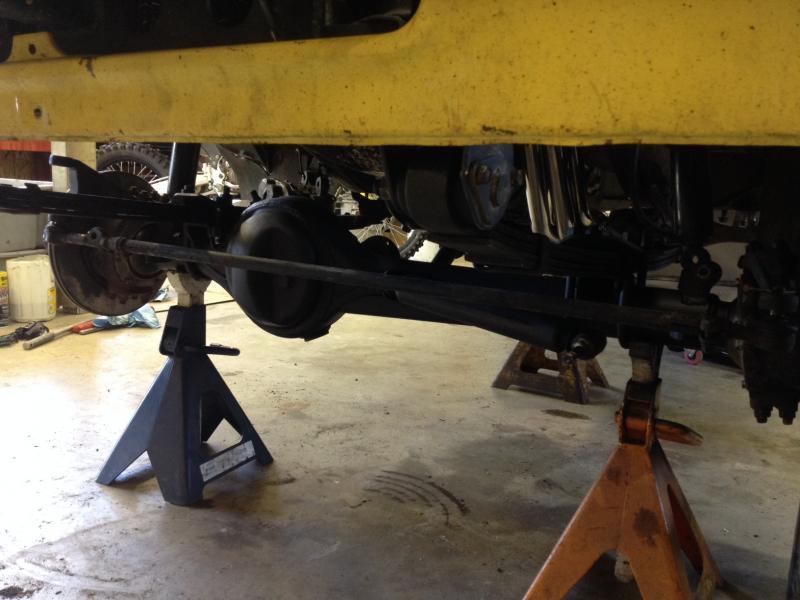
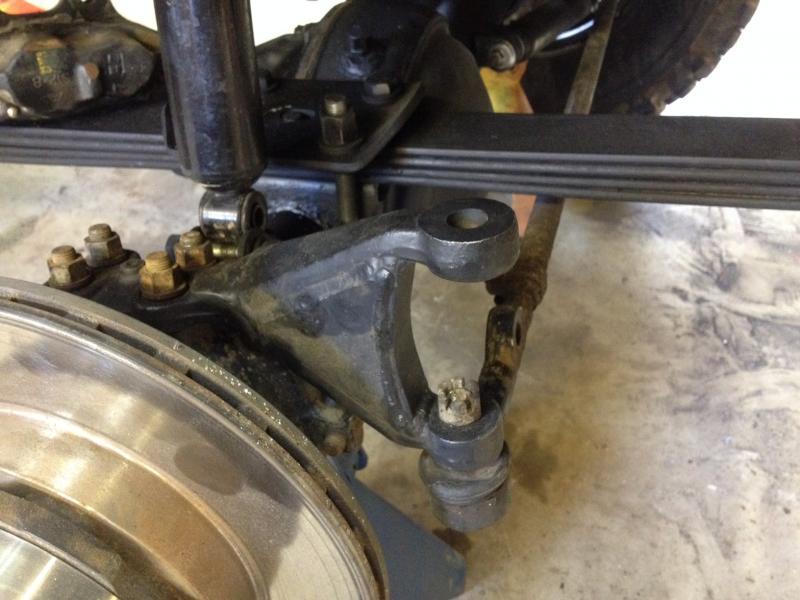
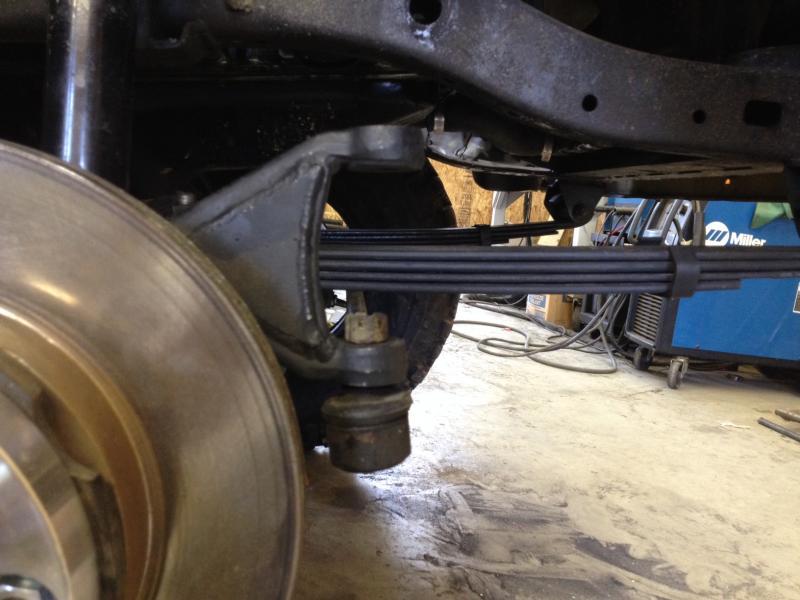
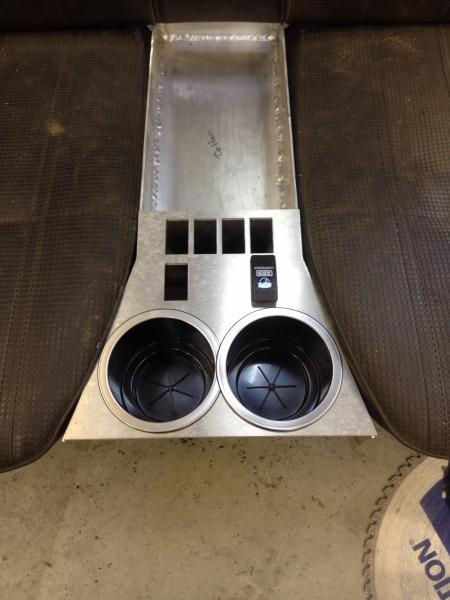
Did a bit of work over last weekend and a little this week. Waiting on a few more parts to show up but It is coming back together good. The wheels are out getting powder coated, getting a few more things cut out on the plasma table, I got the Sky less drop pitman arm coming to finish out the steering. Gotta install drivelines and a few missing bolts here and there and take it to the exhaust shop. More to come....
Attachments
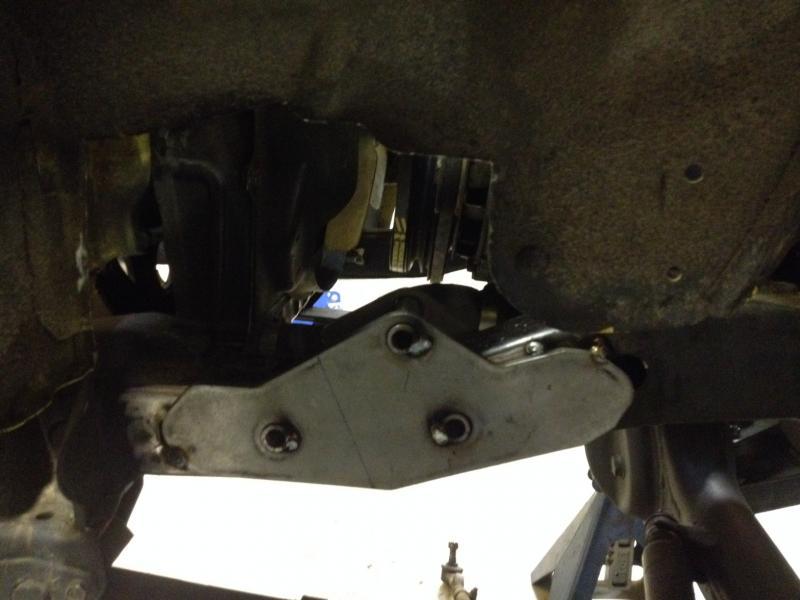
Last edited:

CHOP SHOP
Well-Known Member
Oooh, old school crossover, I like it!
Maverick26
As iron sharpens iron...
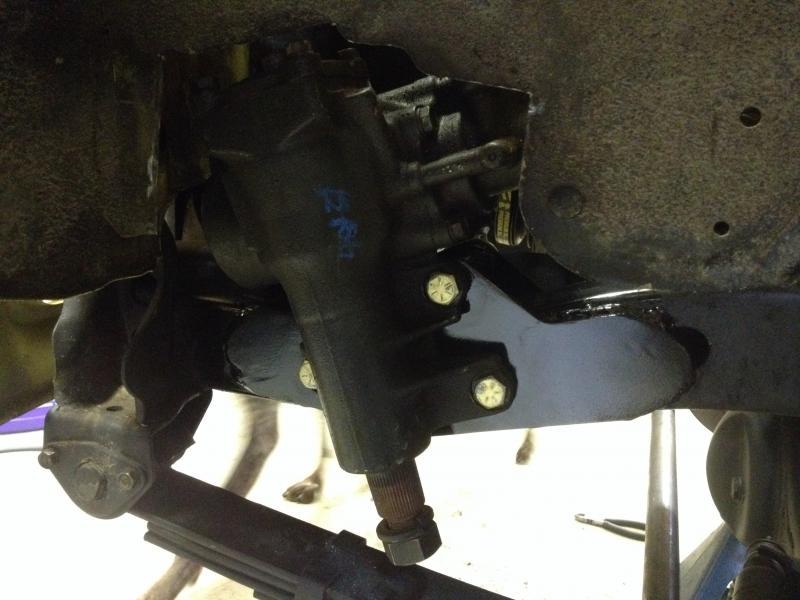
Mark m.
Well-Known Member
Oooh, old school crossover, I like it!
You have spent money on everything else. Why get cheap on the most important part of the rig IMO. Home made steering for a street rig. Why Hysteer is cheap.
Its shaping up to be a sweet rig.:awesomework:
Maverick26
As iron sharpens iron...
You have spent money on everything else. Why get cheap on the most important part of the rig IMO. Home made steering for a street rig. Why Hysteer is cheap.
Its shaping up to be a sweet rig.:awesomework:
Cause hysteer drives like ****, it changes all the angles of the steering geometry and I dont want to lift the truck 10 feet just the clear steering. Stop busting my balls Mark, Im busy ****in this thing up as fast as I can! :redneck: This truck will probably drive better than my dodge.

skinny_pedal
Well-Known Member
Your going to kill a bus full of pregnant nuns with that steering :flipoff:
Mark m.
Well-Known Member
Hy steer drives like ****? How much lift do you have? You only need 3" for it.
CHOP SHOP
Well-Known Member
Hy steer drives like ****? How much lift do you have? You only need 3" for it.
He is refering to the ****ed up Ackerman angle that hysteer arms have to clear the rim lip when put on top of a knuckle.
The hysteer arms dont put the tires in a correct circle when turned.
Measure the length of a hysteer tierod (not draglink) and then compare it to the stock tierod mounted down low, the stock one will be longer as the arms are further out than a hysteer.
I think its 4xlabs that makes a correct kit.
Nothing wrong with a welded arm if ya know how to weld properly. :beer:
Mark m.
Well-Known Member
Well I put about 50,000 miles of road driving with my Hysteer and it was much better that the stock ****. So what ever I guess if your going to be cheap with something the steering seems to be a good place for it.
CHOP SHOP
Well-Known Member
Well I put about 50,000 miles of road driving with my Hysteer and it was much better that the stock ****. So what ever I guess if your going to be cheap with something the steering seems to be a good place for it.
Yes a hysteer drives MUCH better than a stock rig with push/pull and bump steer no doubt.
But a crossover with proper arms is EVEN better!
Maverick26
As iron sharpens iron...
http://www.aqualu.com/specials.html
Scroll down to the bottom of the page on the Aqualu site. This is what I built myself. I know it’s been used for years before Hysteer came about. I know it will work just fine. The weld process was overkill but was performed as fallows- prepped all welding surface with sandblaster and bevel ground all weld channels. Preheated base metal to 500*F and welded a complete hot GTAW root pass with ER70S-2 filler set at 160a. Once root was complete, followed up with GMAW cover pass with .035 ER70S-2 set at 8.5 on the autoset with no undercut. Bracing in web was done the same way. Bracing is 2 triangle plates 1/4" thick with a boxed in end of 1/8" flat bar radius bent to 8" for added structure. If any of you arm chair engineers think you can destructive test this steering arm I will gladly lend it out for testing. :fawkdancesmiley: Just having fun building this thing guys... its all good.
Scroll down to the bottom of the page on the Aqualu site. This is what I built myself. I know it’s been used for years before Hysteer came about. I know it will work just fine. The weld process was overkill but was performed as fallows- prepped all welding surface with sandblaster and bevel ground all weld channels. Preheated base metal to 500*F and welded a complete hot GTAW root pass with ER70S-2 filler set at 160a. Once root was complete, followed up with GMAW cover pass with .035 ER70S-2 set at 8.5 on the autoset with no undercut. Bracing in web was done the same way. Bracing is 2 triangle plates 1/4" thick with a boxed in end of 1/8" flat bar radius bent to 8" for added structure. If any of you arm chair engineers think you can destructive test this steering arm I will gladly lend it out for testing. :fawkdancesmiley: Just having fun building this thing guys... its all good.
Last edited:
Maverick26
As iron sharpens iron...
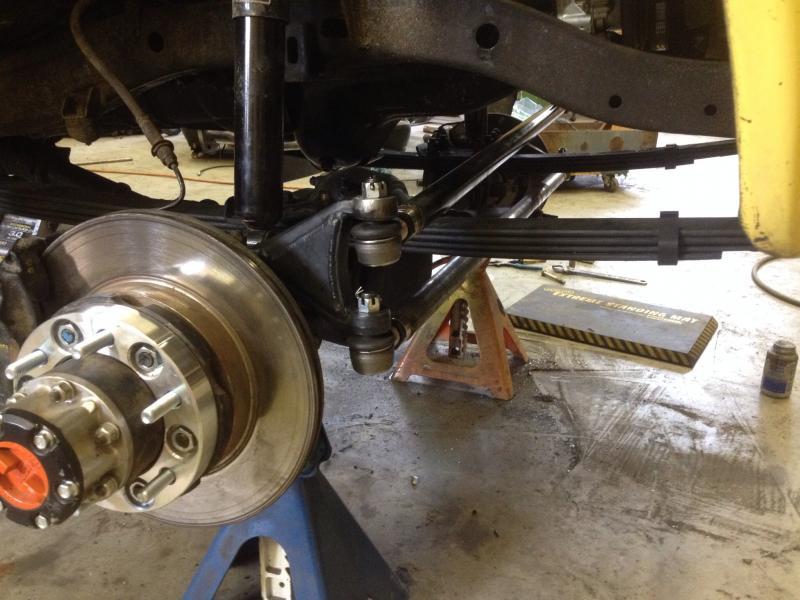
Maverick26
As iron sharpens iron...
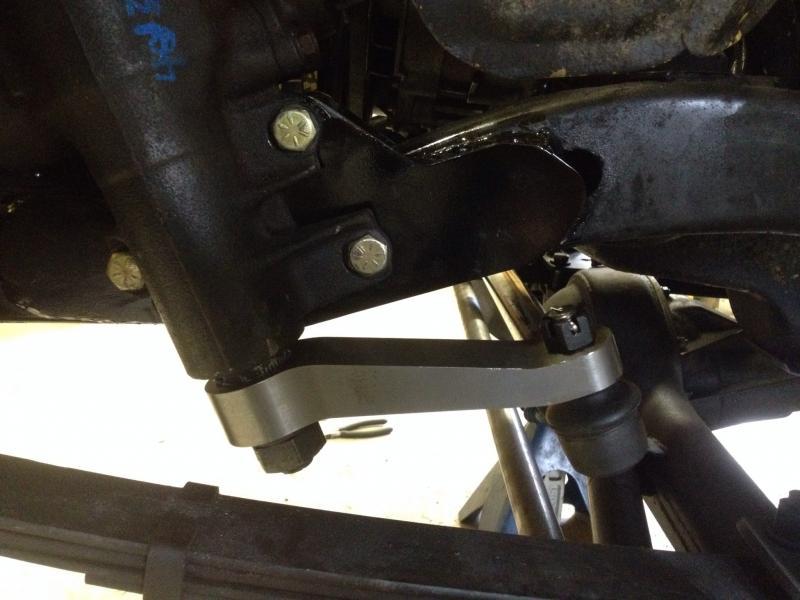
Maverick26
As iron sharpens iron...
Maverick26
As iron sharpens iron...
Got the skid plate done from Dave and got my wheels back from powder coater last night! I am busy getting **** ready for the Desert 100 so I wont get anything done on this tell next week.
Maverick26
As iron sharpens iron...
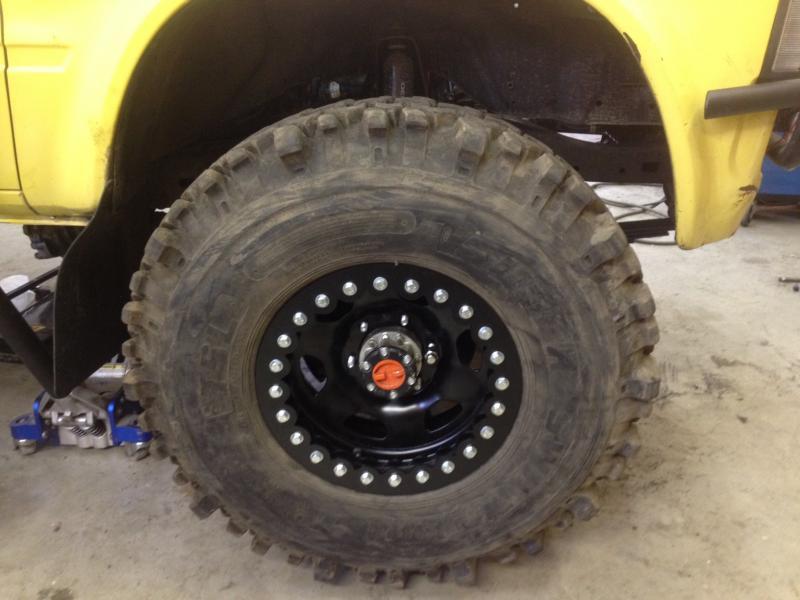
Got the tires mounted last night, I used airsoft BBs to balance them so we will see how that works. The beadlocks with anticone rings worked great from Jester Fab! I sure love the look of those 34x9.5 tires! Just doing the typical nut and bolt work now finishing up loose ends. It wont be long now, I hope to be driving it this weekend! :cheer:
Attachments


1 grumpy
Well-Known Member
Looking good like the 34x9.5 swamper's also
Maverick26
As iron sharpens iron...
Thanks guys! Got her back on tires last night but have a few kinks I need to work out still. Trying to figure out what I want to do with the shock situation. The stock ones are just too short. I might be able to make the rears work if I mount them on top of the axle tube and install my rear flip kit. But the fronts suck, I guess ill use the ford towers and buy new shocks. I got one tire that leaks from 20psi to 0psi in about 45 mins, Ill play with the beadlock to try and get it to seal up a bit better. I bent up some rock slider tubes last night and will be building those up soon. I am taking the seat down to get rebuilt with new foam and recovered with heated seats installed. I hope to have the truck able to drive up on the trailer by the end of the weekend to take to the exhaust shop.
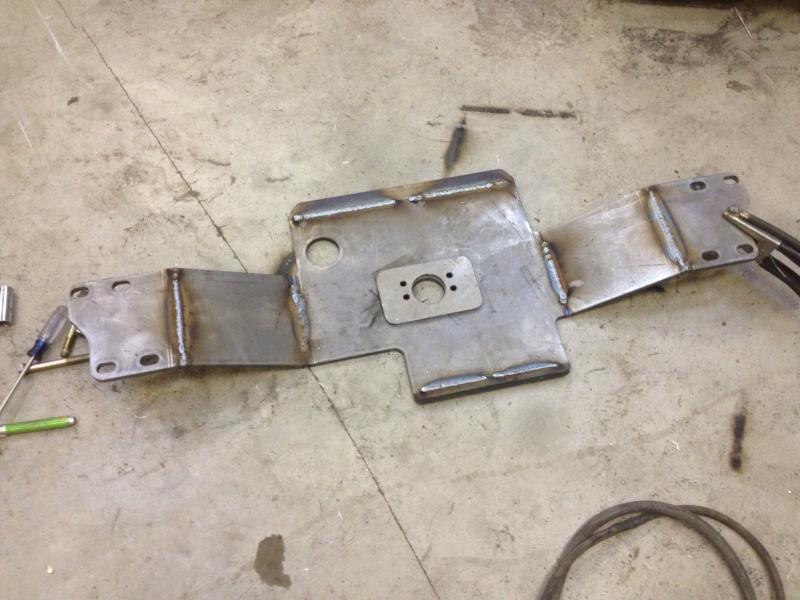
Got the custom JesterFab skid plate welded up last night, ill be fitting it up in the truck tonight! Thanks Dave!!
Got the custom JesterFab skid plate welded up last night, ill be fitting it up in the truck tonight! Thanks Dave!!
Attachments
zukkev
Cornfuzzled yet again...
You'll be able to bring this biotch up for our ShownShine July26th!!! :awesomework: :cheer:

2pwrlftrs4u
NWW Meanie
mav... what MC you ride with?
Maverick26
As iron sharpens iron...
mav... what MC you ride with?
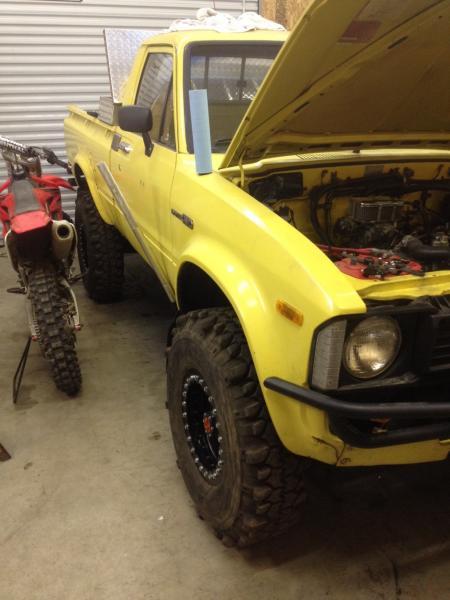
That bike in the pic is a friends bike that he left in my shop for a few days after the desert 100. Its a CRF450r. I just got that new Husky TE250.
Latest posts
-
-

-
-
-
-
-
-

-
-
-
For Sale First Generation 4Runner Rock Crawler for sale or trade
- Latest: FirstGenFunRunner
-
-
-
Withdrawn First Generation 4Runner Rock Crawler for sale or trade
- Latest: FirstGenFunRunner
-

![20200223_171049[1].jpg](https://cdn.hardlinecrawlers.com/xfmg/thumbnail/12/12234-e680273a44bd8a1f14891d902b3af0f7.jpg?1782981046)