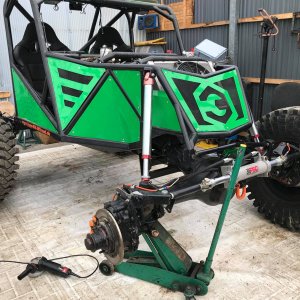
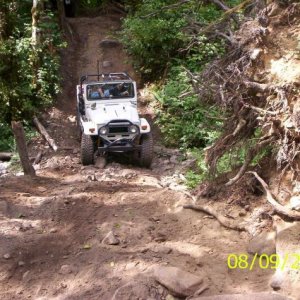
• Help Support Hardline Crawlers :

My Junk

Ok a little update, just kinda poking along here.

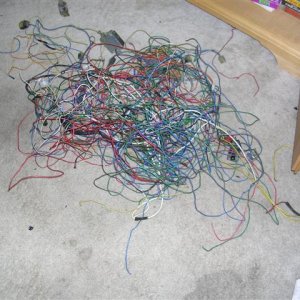
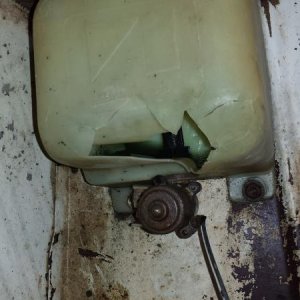
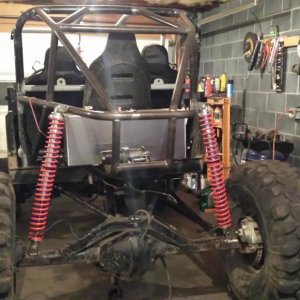
I got the driver fender well wired as far as I could go. I was able to dig out my spare Alt harness to finish that off, but I am still missing the igniter so I can't finish this side. So the upper half is just roughed in.

boosted17.jpg


boosted18.jpg


I got a good portion of the passenger side done also.

boosted19.jpg


I could only go so far until I am able to do the power circuits (waiting for my shippment) and the rest of the missing parts for the EFI.

boosted20.jpg
 
I located the sweet spot for the air box. I used the same method for mounting the air box that I used like 7 years ago on mine. I basically made standoffs for the air box to sit on.

boosted21.jpg


I was amazed the cross tube fit perfectly.

boosted22.jpg


Air box mounted..

boosted23.jpg


I was going to wait to work on mounting the reservoir tank for the power steering until I got the igniter. But I changed my mind and started playing with the bracket.

boosted24.jpg


What a POS this thing is, the fitment was pretty bad. So I started cutting it up to make it fit good.. Should have it done tomorrow night.
 
Wow, looking better than I imagined. Damn, I need to work on that parts list before I go.... :mad:

I will gather together everything I can tomorrow and drop it off at your work along with the arb's and longfields.
 
Wow, looking better than I imagined. Damn, I need to work on that parts list before I go.... :mad:

I will gather together everything I can tomorrow and drop it off at your work along with the arb's and longfields.

Aint seen anything yet :redneck: I am just getting warmed up :awesomework:
 
Ok I got the bracket cut up and redone to fit ALLOT better.

boosted25.jpg


boosted26.jpg


boosted27.jpg


And bolted it down to make sure it fit nicely. I had to move the harness retainers and harness a tad. But it is a ton better than it was..

boosted28.jpg


boosted29.jpg
 
You could go work for TG with that same backwards logo thinking you got going on.... :redneck:

Looks great Mike. Im gonna swing by your work tomorrow afternoon with a box full of goodies for you to throw at the junk. :;
 
I will post some pics tommorow--just walked out of the shop. Didn't get a chance to get to my phone james--long day..
 
Any updates? I wanna have a long distance relationship with my junk and need more pics !!! :fawkdancesmiley:

Ow ya 2 weeks and he will have it done:stirpot:

Till it got there and you had him rebuild the whole truck

Geeze give him a chance
 
still waitn on a call from cash, speaking of cash, check in the mail?:corn:

You drop the parts off to Mike? If so, as soon as I talk to him, I will send out the payment. Ive been on the road for the past 3 days and just got to South Carolina and havent had a chance to do anything yet.

BTW, the weather here is amazing....too bad the wheelin is not. :fawkdancesmiley:
 
Ok---I will start by some "updates",lol....

Ok so I got the new power steering cooler mounted.

boosted30.jpg


I ended up making 2 mounts for the top and 2 for the bottom. Never mount something directly to the radiator if you can help it.

boosted31.jpg


boosted32.jpg


And I got the rest of the hoses ran.

boosted33.jpg


boosted34.jpg


I was not real impressed with the fittings TG sends to go to the reservior tank. With the angle of the pump, it points the main feed at an odd angle. Since the res tank needs to be as high as possable it causes you to have to bend the hose. They should have sent a 45 degree fitting.
 
Another thing I got was the main power feeds to the junction block.

I was able to dig out my one spare alternator plug and get the alt wired up.

boosted35.jpg


One thing I have tried in the past and been successful with is running the alt across the motor to the passenger side. One thing you need to make sure is the feed wire is retained and kept safe from sharp edges.

boosted36.jpg


I also got all new ground cables made (motor to frame and frame to body). And I jst ran the Alt wire along with the grounds. I also had to run a new power wire to the winch as the one that was on it was too short.

boosted37.jpg


Up the fenderwell and you can also see the new starter cable.

boosted38.jpg


And to the new main junction.

boosted39.jpg


All main power feeds will come from this one spot.
 
So the next thing to tackle--was to find a spot and mount this jewel.

boosted40.jpg


Some years ago I found sweet spoit to mount ECM's on a first gen. Pull the glove box insert and right about that is where a single dash speaker used to go. Its nice and high and there is enough room to even get a gm ecm to fit. This is where my ecm has been mounted for 6 years with zero problems. But the one thing that makes it nice, there are 2 threaded holes in the metal skeleton of the dash. The picture is kinda dark but you can see the holes (red spots)

boosted41.jpg


Next thing to do was make a bractet that bolts to those holes and to the ecm to hold it firmly into place.

boosted42.jpg


boosted43.jpg


And here it is mounted to the ecm. I utilized the threaded holes on the side of the ecm's case.

boosted44.jpg


And there you have it--up in its new home.

boosted45.jpg
 

Latest posts

Top