• Help Support Hardline Crawlers :

My long awaited build thread...

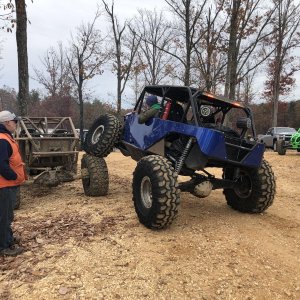
I had no idea that was "XJoe's" YJ @ the Crashs'!!! I would have left you something "nice". :redneck:

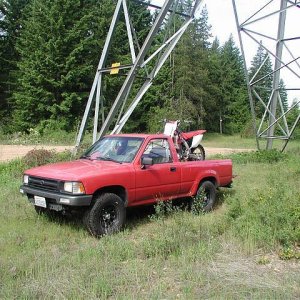
Looks awesome, but could use a special paint job from Mrs. Crash. :cheer:
 
Excellent build once again Mike. :awesomework:

Joe, with all the work being done what made you want leaves vs. putting in a 4 link?
 
So--to keep in the mood of doing some of the odds and ends--figured it was time to lay a little pipe (noo- not that pipe,lol)

So I figured it was time to do some brake work so I made a list and jammed down to the parts store to load up on goodies . So the first step was to figure out just where the heck to put the rear perportioning valve. I finally found a nice location behind the brake booster and made a little mount for it. You can't see it but the residual valve is right under the perportioning valve.

joe119.jpg


joe120.jpg


And down to the line locks

joe121.jpg


This is as far as I am taking the brake lines until I get the lines done on the diffs then I will plumb the rest of them.
 
Excellent build once again Mike. :awesomework:

Joe, with all the work being done what made you want leaves vs. putting in a 4 link?
$$ was an issue, I figured I'd start with the basics, a frame, one tons ect... I know I will eventually either back half this pig and link it or just go with a tube chassis.:redneck:
 
So the next thing I decided to do---keeping on the current "theme" lol--time to work on getting motor some fuel(since at this point thats the only thing thats keeping me from trying to start this thing).

So the first thing to figure out was the return line off the fuel rail. The stock one was pretty short and headed straight to where the new power steering reservoir is. The stock fuel line is also made of what looks to be stainless steel and I wasn't even going to try and rebend it into a usable shape--so I picked my target and gave it a good old throw (aimed for the garbage can and almost hit the zook,lol)..

So here is how I decided to do the return line.


joe122.jpg


joe123.jpg


As you can see I used the fuel rail mounting bolts to mount the line to which worked out pretty good.

For the rubber portion of the lines I just re-used the stock ones. The only thing was on one end it was the female side of the quick release(which worked out perfect) and the other end had a bunch of goofy bends. So I took each line and just cut them and flared the ends(again stainless and was a pain to flare--hard stuff). So I went down to the frame side and cut the stock lines and again flared those ends--made a couple short pieces and wallla--all done..


joe124.jpg


joe125.jpg
 
When is that thing going to be done? I have a new line I want Joe to give a try..:redneck:
 
Ok things have been slow over the last # of days--trying to get the motor out of my father in lws rig so I can put a new one in and some other things. But I have been also trying to poke along on this thing...
So now on the right hand rear of the tub the wiring harness goes down thru the body. Well the previouse owner just cut the harness off when they cut the back of the tub. So my origional plan was to just rewire the back of the rig at the plug. But I got to thinking--why run the harness down an area thats totaly exposed. So I decided to re-route the wiring harness/totaly re-wire it.
So I just made the harness wrap around the back of the tub and down the inside edge and then thru the bottom of the tub.

joe127.jpg


joe128.jpg


Plus since the fuel pump and fuel sender were now in different locations it also made perfect sense to re-do all of it..
And here you can see the fuel sender portion of the harness.

joe129.jpg


I also fully mounted the fuel cell and as you can see I decided to move it to the drivers side to give joe a TAD bit of room for something but it also will protect the wiring/fuel lines since its pretty tight between the fuel cell and the tub on the drivers side.
 
One thing I could never under stand is why they use AN fittings on fuel cells--I guess so you have to pay as much on fittings as you do the fuel cells. In any case on this particular cell the fittings are -8. Now I don't use An alot so I still kinda stuble thru it but I am getting the basic priciple down. Now from my understanding I was under the assumption -8 was roughly 1/2" (where -6 is 3/8). So I got a couple -8 90 degree fittings and some 1/2 fuel line. Well when I tried to get the 1/2" fuel line into the fitings there was NO WAY that stuff was going to fit. So I grabbed some 3/8 rubber line and with some gentle work I was able to get the stuff to go NICELY into the fitting.
So here are some of those FANCY fittings,lol
joe130.jpg

So I pondered how I was going to run the fuel line down thru the tub. Well I knew I had to go from the 3/8's hose to the 5/16(stock) hose. So I decided to do something I had tried in the past that worked really good. Basically use brass fittings and have them sandwhich'd to the tub to hold them into place. This let me not only go from 3/8 to 5/16 but it also made a very secure pass thru for the fuel with no worries of rubber hose rubbing against any single edges.
This picture is from the front side of the fuel cell--it was very tight to get any pics of the setup. But I used 1/2" washers to get the right pre-load when the fittings were screwed together.

joe131.jpg


joe132.jpg
 
And here you can see why I did the mount like I did. A couple hose clamps and the pump is now locked into place. I did the same on my rig when I re-did the fuel feed portion of the system and have had ZERO problems with it..

joe133.jpg


And here you can see the rear of the wiring that is all now new stuff.

joe134.jpg


And the tail lights are pre-wired for what ever lights joe decides to go with.

joe135.jpg


So I plugged the ecm in and the fuel pump promes with the key turned on which tells me SO far I have done things right,lol. So now its ready to dump some fuel into the cell to check all the fuel lines for any leaks----which also means once I get a new coil wire its ready to try and fire off.
 
You fawkers went and got the same AN fittings I have. :mad: 
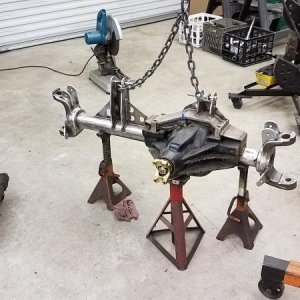
But I thought you were going to mount it behind the cage.

p1040063ku4.jpg
 
Top