• Help Support Hardline Crawlers :

1981 Toyota Build

TTF Fabrication

Well-Known Member
Joined
Nov 27, 2006
Messages
431
Location
Kirkland
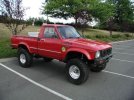
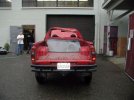
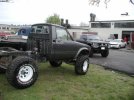
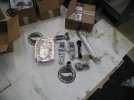
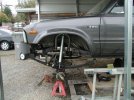
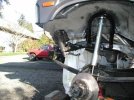
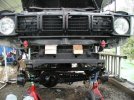
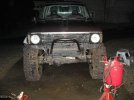
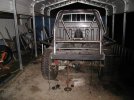
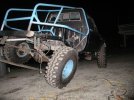
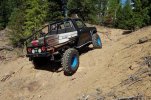
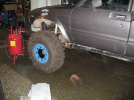
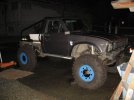
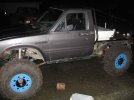
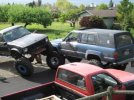
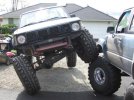
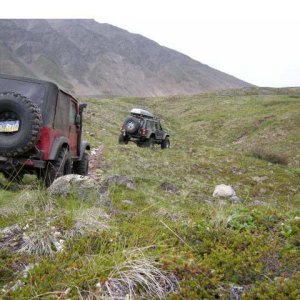
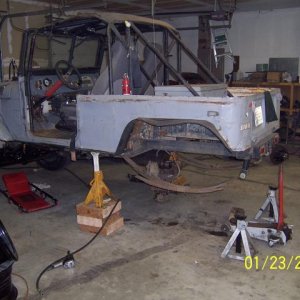
I am finally posting a build of my truck. It started out as a nice clean 1981 Toyota shortbed (red). 22R 4spd. w/ a 3" lift and 32's. I rolled it up near Quartz Mtn. in October of 2004 (my senior year). I pressed on to do a cab swap as my senior project and that's about all I got done my whole sr. year on it. but after i graduated i just started collecting parts and building it.
 

Attachments

  • cutfenderright.jpg
    cutfenderright.jpg
    81.4 KB · Views: 577
here is a picture of the damage of the rollover, and then skipping forward to with the new cab on and that is rolled out of the paint booth right after i finished painting it.
 

Attachments

  • rolled3.jpg
    rolled3.jpg
    40.6 KB · Views: 576
  • painted2.jpg
    painted2.jpg
    44.3 KB · Views: 572
so i started collecting parts to do the build. BBCS 15's, bilstein 14's, MC07 adapter, marlin skidplate, hy-steer.
 

Attachments

  • marlinparts.jpg
    marlinparts.jpg
    36.7 KB · Views: 576
  • marlinparts2.jpg
    marlinparts2.jpg
    34.7 KB · Views: 563
  • shocks.jpg
    shocks.jpg
    47.2 KB · Views: 569
i also picked up yukon 5.29's, spool rear, aussie front, s10 rear springs, toyota rears up front with 1 waggy under it (5 leaf total). and started throwing everything together. i had to move my box forward so i cut the body mount out, and to match i hacked the other side too. i now run a tube from the body mount to the front spring hanger and people always ask me how much of a body lift i have.
 
more pics
 

Attachments

  • rebuiltaxle2.jpg
    rebuiltaxle2.jpg
    79.6 KB · Views: 562
  • shock3.jpg
    shock3.jpg
    49.5 KB · Views: 566
  • shock4.jpg
    shock4.jpg
    57.2 KB · Views: 555
  • steeringbox.jpg
    steeringbox.jpg
    57.5 KB · Views: 558
  • steeringmods3.jpg
    steeringmods3.jpg
    64.6 KB · Views: 558
the first pic is the only one i have of the front body mounts. since i smashed the bed in the rollover, i just built a flatbed because decent first gen shortbeds are hard to find. it's all 1 5/8" .120 DOM
 

Attachments

  • craigslist 053.jpg
    craigslist 053.jpg
    56.4 KB · Views: 552
  • flatbed13.jpg
    flatbed13.jpg
    52.1 KB · Views: 544
  • pb7.jpg
    pb7.jpg
    53.1 KB · Views: 537
  • tash2.jpg
    tash2.jpg
    44.8 KB · Views: 543
just yesterday i finished a set of weld on beadlocks, and mounted a set of 38x12.5 TSL's on em. i am also in the works of making new motor mounts. by memorial day weekend i will do an in cab cage, sleeved like all pros kit so if i decide to cut the roof off, i can take it out and sell it. and i will be running bobbys 30 splines and chromo hub gears before that weekend too. pics of the new wheels and tires...
 

Attachments

  • craigslist 056.jpg
    craigslist 056.jpg
    66.5 KB · Views: 535
  • craigslist 060.jpg
    craigslist 060.jpg
    53.9 KB · Views: 545
  • craigslist 063.jpg
    craigslist 063.jpg
    56.1 KB · Views: 531
I like the look of those beadlocks on there!!!

Now you can run lower pressure in the snow and maybe not get stuck on the flats lol
 
oh, i was already at 2psi on standard wheels in the snow, i don't know what the problem was. but i do know that i got it home and both motor mounts were torn.
 
TTF Fabrication said:
oh, i was already at 2psi on standard wheels in the snow, i don't know what the problem was. but i do know that i got it home and both motor mounts were torn.

Huh, sidewalls on those tires can be very stubborn i know that, now you can run 0 and break the sidewalls in properly:clappy:

Whoa how in the heck did you tear yer motor mounts its not like you did anything insane that day
 
i think the passenger one was already halfway done. then on the whoop section on the way back down, my shifter was floppin everywhere, and it finally made its resting place all the way to the left of the tunnel cutout. not to mention the motor was flexin enough to hit the fan on the shroud and pull my coil wire out.
 
TTF Fabrication said:
i think the passenger one was already halfway done. then on the whoop section on the way back down, my shifter was floppin everywhere, and it finally made its resting place all the way to the left of the tunnel cutout. not to mention the motor was flexin enough to hit the fan on the shroud and pull my coil wire out.


I C

I remember that section now, acctually there were several areas of woops on that run even in crash's rig it was pretty bumpy i cant even imagine what it was like on leaf springs thats for sure
 
So what did u think of Dullum i can tell by the pictures thats lake washington auto body class!!!! when do u graduate from there?
 
dullum was awesome, i graduated in 2005. i went with the off road overstock locks, and they were very easy to do. it is really time consuming, but this is a very nice kit. the ring sits inside the lip of the wheel, so it centers itself pretty damn good, if you put 4 lock washers in the gap between the inner ring and the lip of the wheel, it centers perfectly. and i welded them, ground them down, then hit them with a flap disc to show any pin holes. i then had them powder coated, and they do not leak at all. i like these locks because they are a 24 bolt, the outer ring is huge, and the inner ring is coned a little bit to actually aid in the seating of the tire, because the tire comes into a cone shape anyways. very quality and an extremely reasonable price.
 
i misread your post rooinater. i thought you meant how hard was it to center the ring on the wheel to weld it. it wasnt too bad to center the tire. i got it pretty darn centered, and then once i cranked the bolts down on the outer ring, the tire damn near centered itself. i picked up one of those cheasy little air compressors for $50 and figured i'd give it a whirl. well i pulled the valve core on one of my tires, and from rim sitting on the ground to 20 psi in a 38" tire it took under 4 minutes. that is without a tank, just the cables hooked to the battery and the vehicle running. i was pretty impressed with a cheap little compressor unit. i also got my motor mounts done today, just need to install them and flex the truck to see where i need to cut for the 38's to not rub.
 

Attachments

  • craigslist 073.jpg
    craigslist 073.jpg
    47.3 KB · Views: 307
  • craigslist 075.jpg
    craigslist 075.jpg
    40.7 KB · Views: 306
fyi i hella manhandled those tires on the truck:clappy:

looks sick bro. long live the powder blue....ill cut a man who uses it besides us:flipoff:

Bunk your an exception:cool:
 
got chevyxj over here helpin my dad and i do a leveling kit on his new duramax and i decided to flex on his 38 to see how bad my 38's rub... here's the results.
 

Attachments

  • craigslist 078.jpg
    craigslist 078.jpg
    54.6 KB · Views: 259
  • craigslist 079.jpg
    craigslist 079.jpg
    48.5 KB · Views: 251
  • craigslist 084.jpg
    craigslist 084.jpg
    47.4 KB · Views: 249
  • craigslist 085.jpg
    craigslist 085.jpg
    46.5 KB · Views: 252
  • craigslist 089.jpg
    craigslist 089.jpg
    37.8 KB · Views: 252
Top