• Help Support Hardline Crawlers :

mopar buggy project

moparmagician

Well-Known Member
Joined
Nov 20, 2007
Messages
90
Location
Kelso, Wa.
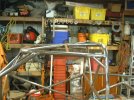
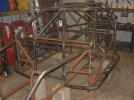
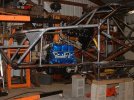
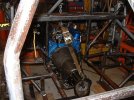
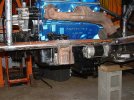
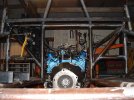
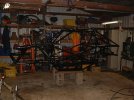
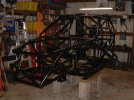
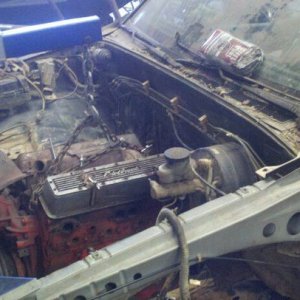
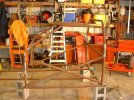
Well here goes. I started off with a alston chassisworks tube chassis build I was doing a few years back, until several circumstances made me stop. It was sitting out back on a trailer and a tree fell on it. I think someone was trying to tell me something. It didn't hurt the frame, but destroyed the nice body I had on it. Anyways, the plan is Mopar 3.9 v6, 727 torqueflite, manual valve body, 2.77:1 first gear, dual cases, 203 coupled to a 205, dana 60's front and rear, arb air locker front, spool rear, full Hydraulic steering, tires?, 18" travel sway away air shocks, 4 link front and rear, and tons of hours which in my opinion building is half the fun.

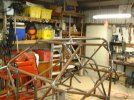
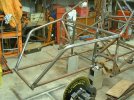
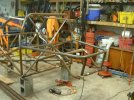
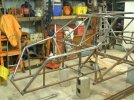
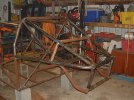
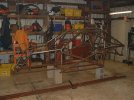
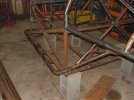
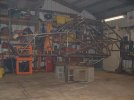
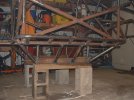
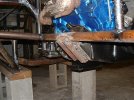
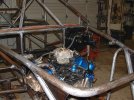
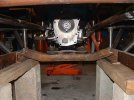
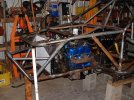
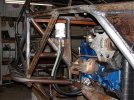
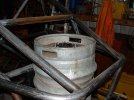
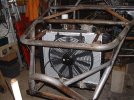
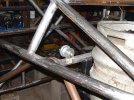
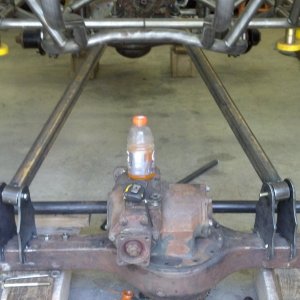
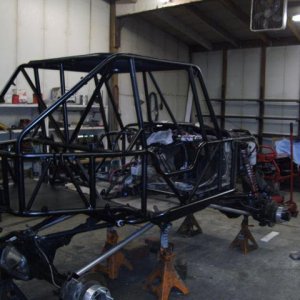
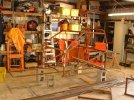
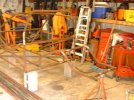
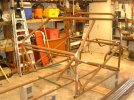
In the below pics, I need to cut things and modify a bit. I first needed some headroom. So I cut at strategic places and added 6" of height. I also widen the rear frame rails as it was no longer going to house 15" wide slicks inside the confines of the body.
 

Attachments

  • DSCF0001.jpg
    DSCF0001.jpg
    72.9 KB · Views: 789
  • DSCF0002.jpg
    DSCF0002.jpg
    76.1 KB · Views: 790
  • DSCF0003.jpg
    DSCF0003.jpg
    64.2 KB · Views: 783
  • DSCF0005.jpg
    DSCF0005.jpg
    63.8 KB · Views: 774
  • DSCF0007.jpg
    DSCF0007.jpg
    57.9 KB · Views: 770
Last edited:
Now added x brace at back of cab, and on roof. Also some gusset braces in the corners. Then front upper bars, and rear upper. V bars on windshield area, and cross bars on roof. I didn't like the big gap between bars where my head is, in case it goes over on it's roof.
 

Attachments

  • DSCF0012.jpg
    DSCF0012.jpg
    60.3 KB · Views: 758
  • DSCF0023.jpg
    DSCF0023.jpg
    74.6 KB · Views: 746
  • DSCF0021.jpg
    DSCF0021.jpg
    60.8 KB · Views: 746
  • DSCF0025.jpg
    DSCF0025.jpg
    63.6 KB · Views: 726
  • DSCF0026.jpg
    DSCF0026.jpg
    63.6 KB · Views: 728
Added more bars to the rear, and it's starting to resemble something. By the way, this is so far all 1 1/4" schedule 40 tubing, about .130 wall. Now I've added rock sliders, which are schedule 80, .190 wall. I like these on a buddies rig, keeps the trees and such a bit farther away from me, added protection. Also added nose piece and stinger.
 

Attachments

  • DSCF0027.jpg
    DSCF0027.jpg
    72.3 KB · Views: 705
  • DSCF0029.jpg
    DSCF0029.jpg
    60.5 KB · Views: 692
  • DSCF0031.jpg
    DSCF0031.jpg
    58.5 KB · Views: 699
  • DSCF0033.jpg
    DSCF0033.jpg
    69.3 KB · Views: 685
  • DSCF0035.jpg
    DSCF0035.jpg
    59.8 KB · Views: 676
made what I call the basket. This will cage in the transmission and t cases, provide mounting for crossmembers and a 1/4" steel skidplate. I used 3" channel iron on the lower because of ease of mounting stuff to it, also I think it's a bit stronger than tubing for this area.
 

Attachments

  • DSCF00037.jpg
    DSCF00037.jpg
    49.8 KB · Views: 685
  • DSCF0038.jpg
    DSCF0038.jpg
    59.9 KB · Views: 689
Next is test fitting the engine and trans I just got finished rebuilding. Oh boy, is it tight. I kept the front main frame rail width the original chassis had, and I sure wish I had widened it also. It is 20" to the inside of the tubes, not nearly wide enough. Yes the engine fits, but the starter is 1/4" away, I had to really modify the power steering pump brackets, and exhaust is going to be fun to say the least. It's going to work, but next time things will be different. I got the motor mounts made and they look like they will work fine, I am going to add a bit more bracing to them and chain down the engine on the left side so the starter can't hit the frame from torque.
 

Attachments

  • DSCF0040.jpg
    DSCF0040.jpg
    80.3 KB · Views: 679
  • DSCF0041.jpg
    DSCF0041.jpg
    70.5 KB · Views: 668
  • DSCF0044.jpg
    DSCF0044.jpg
    77.5 KB · Views: 677
  • DSCF0045.jpg
    DSCF0045.jpg
    78 KB · Views: 652
  • DSCF0046.jpg
    DSCF0046.jpg
    69.9 KB · Views: 645
In the last set, you'll also notice I got the master cylinder and booster installed along with the pedal assembly. I used a booster off a 78 dodge 1 ton van, it's smaller in diameter than most, and it uses a 1 1/8" bore master cylinder, plenty big enough for just about any brakes I run. It's got plenty of under hood room, and you'll notice I used the crossmember out of my old 77 dodge for the trans. I just cut it down and added channel iron to the ends, then thru bolted it the the lower rails. Added also is a piece of light angle iron, for a dash. I am thinking of using a piano hinge so it can be easily raised up to access wiring and backs of gauges. Still has a long way to go, but I am having a blast so far with the build.
 

Attachments

  • DSCF0047.jpg
    DSCF0047.jpg
    78.4 KB · Views: 640
  • DSCF0049.jpg
    DSCF0049.jpg
    69.4 KB · Views: 646
  • DSCF0048.jpg
    DSCF0048.jpg
    57.7 KB · Views: 637
pipe and mopar parts my god who would use that crap :rolleyes: :puke:


Looking good Marty and thanks for helping me change that output shaft this weekend :awesomework: :cheer: .
 
pipe and mopar parts my god who would use that crap :rolleyes: :puke:


Looking good Marty and thanks for helping me change that output shaft this weekend :awesomework: :cheer: .

Just remember that big tow loop on the back is for towing chevys home when they can't get their under thier own power. Remember yours decided to lay down on its side and take a nap, then broke when it got back up. Glad to help buddy, anytime, and thanks for all your help and advice.
 
So, why the V6 over a small block? had the V6 laying around?

Mainly I'm just not into the horsepower thing for this sport. I had a v6 jeep years ago and it did fine for what it was. Also I figured I'd break less stuff with the V6 to. Not to mention the power to weight ratio is probably better than most since it's a buggy and not packing all that extra stuff. I might change my mind, but being in other buggies, with V6's, I was impressed.
 
Last edited:
Just remember that big tow loop on the back is for towing chevys home when they can't get their under thier own power. Remember yours decided to lay down on its side and take a nap, then broke when it got back up. Glad to help buddy, anytime, and thanks for all your help and advice.


OUCH lol:redneck:

Dont know how good the advice and help are but glad to give both anytime.
I think that the origonal chassis was made out of 1 5/8"x.134" herw?? the pipe is 1 1/4"x.140 and .190" wall.

Mine is coming along pretty good, you should come out and check it out when you get a chance, I am on day shift this week and have Sat-tues. off. I will have to start a build up thread later on:; .
 
Mainly I'm just not into the horsepower thing for this sport. I had a v6 jeep years ago and it did fine for what it was. Also I figured I'd break less stuff with the V6 to. Not to mention the power to weight ratio is probably better than most since it's a buggy and not packing all that extra stuff. I might change my mind, but being in other buggies, with V6's, I was inpressed.

:awesomework:
 
New Years weekend, added a couple of more support bars for the front end. Remote oil filter setup, as the narrow frame rail I had talked about earlier was in the way. My beer supply, oh, it's now a fuel cell, hmmmm, I wonder if it will run on beer? Just cut the top of the keg out, and installed a RCI fuel cell cap. And the radiator is in, it fits. I used one that was for a 68-70 nova/ chevelle with a small block, which is 17"x22". Go Dan now uses an aluminum core and plastic tanks for this application. The original 2" core was replaced by a 1.25" core. I did some checking with several sources and all say it will be fine. I was worried about the smaller core, but they promise me it'll work. Then there is the all important kill switch. I will run the alternator charge wire back to the battery side of this so it kills everything. I am an NHRA Tech official and it's amazing how many drag cars don't have this wired properly and you shut the switch off, and amazing enough, thier alternators work fine, cause it keeps on running.
 

Attachments

  • DSCF0051.jpg
    DSCF0051.jpg
    83.4 KB · Views: 341
  • DSCF0052.jpg
    DSCF0052.jpg
    82.4 KB · Views: 343
  • DSCF0053.jpg
    DSCF0053.jpg
    60.2 KB · Views: 357
  • DSCF0054.jpg
    DSCF0054.jpg
    81.6 KB · Views: 359
  • DSCF0057.jpg
    DSCF0057.jpg
    79.5 KB · Views: 339
Removed everything, figured I better get things painted before I get too carried away. I can always sand paint off to weld things on later. I sanded the loose surface rust off, what was on the original bars from being outside, then used rust mort on them. Then I used hammerite black, what a pain. Yes I brushed it, and it's thick, not sure I would use it again. I have blisters on my fingers from the paint brush. I would have thinned it, but the can says not to. From here on out though, it will be rattle can on the scratches.
 

Attachments

  • DSCF0058.jpg
    DSCF0058.jpg
    60.9 KB · Views: 342
  • DSCF0059.jpg
    DSCF0059.jpg
    66.8 KB · Views: 345
Top