-
Help Support Hardline Crawlers :
You are using an out of date browser. It may not display this or other websites correctly.
You should upgrade or use an alternative browser.
You should upgrade or use an alternative browser.
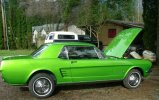
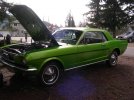
Dad's stang...
- Thread starter crash2
- Start date
crash2
-Oh no I picked a side-
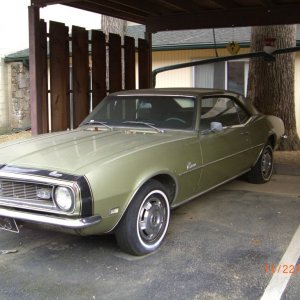
Nice job at fixing up your dads stang, killer color.
Your a good son !!!!!!!!!!!!!!!!!!!!!!!!!!!!!!!!!!!!!!!!!!!!!!
Thanks Grant,,,
crash2
-Oh no I picked a side-
So I got the stuff I needed and got the trunk all done up. Turned out pretty good. I will have a little more to do once the rear bumper is on..

I also used the same stuff and put a coat on the fuel tank since it was pretty rusty--go figure huh.

I also spent a couple of hours finishing up the undercoating via brush---again I was a mess,lol..
I also used the same stuff and put a coat on the fuel tank since it was pretty rusty--go figure huh.
I also spent a couple of hours finishing up the undercoating via brush---again I was a mess,lol..
crash2
-Oh no I picked a side-
I also got the new exhaust (napa). I was very impressed it was built perfect with the bends damn near 100% identical.

The fitment was also prefect. I made the mistake of not fitting it prior (duh) to putting it in. A few of the ends got dinged a little--no biggy.

I also got new mounts (generic type) and modified them to go where the stock ones went. Again the fitment of everything was perfect.


So I have to still grab the gasket at the manifold but for the most part I can scratch that off the list...
The fitment was also prefect. I made the mistake of not fitting it prior (duh) to putting it in. A few of the ends got dinged a little--no biggy.
I also got new mounts (generic type) and modified them to go where the stock ones went. Again the fitment of everything was perfect.
So I have to still grab the gasket at the manifold but for the most part I can scratch that off the list...
im thinking mikes butt hole is puckering as he looks at the un touched stuff thinking well it wont take thaaat long.
he is tossing and turning in his sleep wanting to do the entire thing.....
one weekend after dad gets to drive it a little with a pressure washer and some black hammerite would do it and those springs some justice. but then there all the front end pieces.. and ....:haha::haha:
looking real good,
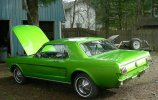
on the trunk i did some ol school i forget what its called. its a flat paint with different colored speckles in it (gray with white speckles). i put it on all the panels inside the framing on the hood and trunk and it realy makes the inside image POP.
ill take a photo tonight if i remember.
that way when dad open it up to show off his son's work it will snap to attention sorta.
kinda like in the movie no time for sergeants:haha::haha:
PLO.
he is tossing and turning in his sleep wanting to do the entire thing.....
one weekend after dad gets to drive it a little with a pressure washer and some black hammerite would do it and those springs some justice. but then there all the front end pieces.. and ....:haha::haha:
looking real good,
on the trunk i did some ol school i forget what its called. its a flat paint with different colored speckles in it (gray with white speckles). i put it on all the panels inside the framing on the hood and trunk and it realy makes the inside image POP.
ill take a photo tonight if i remember.
that way when dad open it up to show off his son's work it will snap to attention sorta.
kinda like in the movie no time for sergeants:haha::haha:
PLO.
War-Jeeper
Mailbox Killing War-Ho
I will get you that part number this morning Mike, i totally spaced yesterday!
crash2
-Oh no I picked a side-
I will get you that part number this morning Mike, i totally spaced yesterday!
noo biggy sam :awesomework:
No I am not touching anything else under the car--just the needed items at this time for longjevity. After its all done if my dad wants we can clean up othyer aspects of the car.
But ya hip--at what point do I stop :haha: but really I am just trying to go as fast as I can and get the car done so dad can enjoy it..
Black_1985_SR5
Member
Nice job I love that color
Mrs. Crash
Administrator
KarlVP
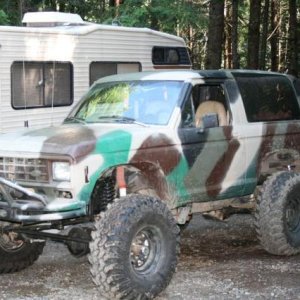
Love that TOYOTA
I got to see it in person today.
I'm extremely envious.
Fawesome job Crash. :rockon:
I'm extremely envious.
Fawesome job Crash. :rockon:
spidertoy
Mod dude....
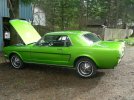
are we sure that we didnt just change cars? that does not look like the same car at all!!!
crash2
-Oh no I picked a side-
So time to get up to date...
So I threw the tires back on and washed the stock hubcaps my dad had bought for the car some years back.

I also got the wiring for the fuel sender all done...

So I threw the tires back on and washed the stock hubcaps my dad had bought for the car some years back.
I also got the wiring for the fuel sender all done...
crash2
-Oh no I picked a side-
I was going to put the badges on the drivers side but found a problem with the pony emblem. The holes are different than what came off it and the pony looks different. I will have to look into this because the drivers side came from a different vender but was still a "drake" prodduct. I recall when I asked my dad to get the drivers side to make sure he got it from the same place (yearone).


crash2
-Oh no I picked a side-
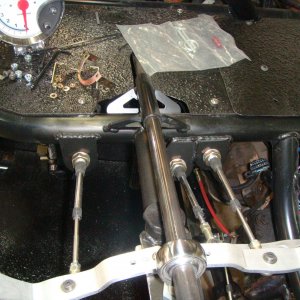
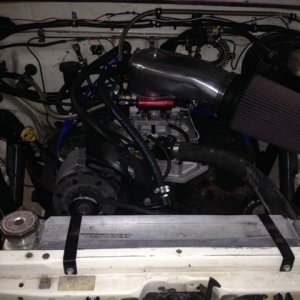
So my goal for today was to get most of the engine bay stuff done.
CT had done some patch work and thrown the tray in but I didn't like how it sat--it shoved the battery into the core support.
So I pulled the tray and found he melted some wires--no big deal and I quickly fixed it back to shape.

Here you can see the patch work CT had done which gave that corner the support back it needed.

I had to notch the holes to let the tray swing a bit and I raised the tray up a tad so it could swing.


And I did away (finally) with the temp cables and made new ones.


At that point I did a couple small things I had left (replace some worn boots) and I will replace the points here this week.
CT had done some patch work and thrown the tray in but I didn't like how it sat--it shoved the battery into the core support.
So I pulled the tray and found he melted some wires--no big deal and I quickly fixed it back to shape.
Here you can see the patch work CT had done which gave that corner the support back it needed.
I had to notch the holes to let the tray swing a bit and I raised the tray up a tad so it could swing.
And I did away (finally) with the temp cables and made new ones.
At that point I did a couple small things I had left (replace some worn boots) and I will replace the points here this week.
crash2
-Oh no I picked a side-
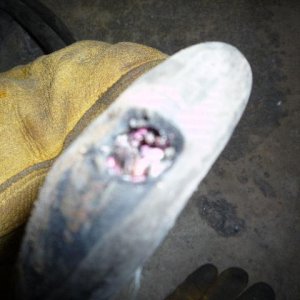
I then got the rear outside window felt in. This took some trickery since it was clips except one small screw (that took some looking to find the right one) but I got it done.

And here was the special tool I made,lol..

Its sure a slow process when your working around fresh paint inside and out.
And here was the special tool I made,lol..
Its sure a slow process when your working around fresh paint inside and out.
crash2
-Oh no I picked a side-
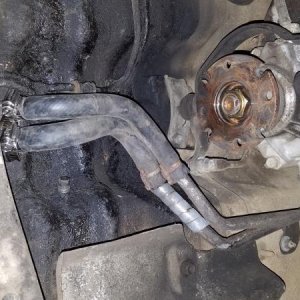
So I then drove it out and flushed the cooling system and gave it some coolant. I had one hose leak that I was able to easily fix(cut hose down a tad) but it now has a fully functioning cooling system and a working heater.
At this point I went for a cruise around the block--full on nervouse wreck but worth it. I have to ask my dad but first gear is really loud--louder than I would think it should be.
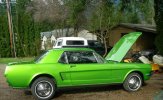
Then I washed the dust off the car and the engine bay. The wheels actually don't look as bad as I thought they would. The car in the sun is just beautiful.


Now here comes a downer. Another thing I wanted to check for was water leaks. I found a large leak from the windshield on both sides--just dumps down the kick panel and to the floor. I also found water on top of the rear fenderwhells---the rear window also leaks. So time to go backwards--grrrrrr. So I ripped the windshield out and resecured the headdliner. At least I will be able to fix the rear paortion of the headdliner when I pull the rear window out.

So the day didn't end as I was hoping--but I will get it done..
At this point I went for a cruise around the block--full on nervouse wreck but worth it. I have to ask my dad but first gear is really loud--louder than I would think it should be.
Then I washed the dust off the car and the engine bay. The wheels actually don't look as bad as I thought they would. The car in the sun is just beautiful.
Now here comes a downer. Another thing I wanted to check for was water leaks. I found a large leak from the windshield on both sides--just dumps down the kick panel and to the floor. I also found water on top of the rear fenderwhells---the rear window also leaks. So time to go backwards--grrrrrr. So I ripped the windshield out and resecured the headdliner. At least I will be able to fix the rear paortion of the headdliner when I pull the rear window out.
So the day didn't end as I was hoping--but I will get it done..
Jeepasaurusrex
Well-Known Member
Hey Mike, the car is looking awesome! :awesomework:
BTW, what did it ramp out at? :haha:
BTW, what did it ramp out at? :haha:
zukkev
Cornfuzzled yet again...
Fantastic Job!!!! Wow...