• Help Support Hardline Crawlers :

Dad's stang...

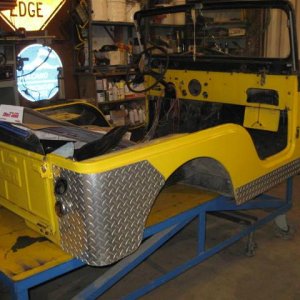
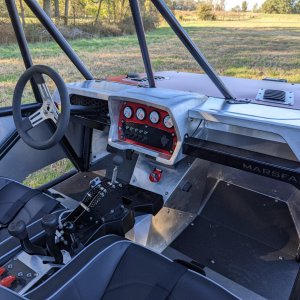
Then came the hard part---carpet fitment. It was tought to get it just right but the quality was pretty good so it went in and looked good. I had to only trim the outer edges where the upper rocker cover overlaps. But it turned out sharp and I got everything installed right down to the high/low beam switch.

dad412.jpg


dad413.jpg


dad414.jpg


So I just have to punch the holes in the carpets for the seat belts and I can finish the interior up.

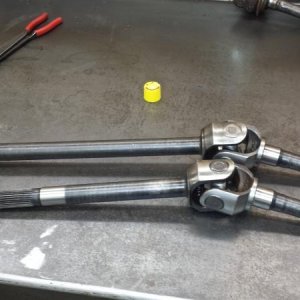
Also here is the new seatbelts my dad got--he was really excited about these.

dad415.jpg


So early monday I should have the seats/belts in the car..
 
Now here is one thing I am still fighting. At some point prior to my dad getting the car the tranny was replaced. It has a hurst shifter and I am not sure if thats factory or not. But there is no backup switch anywhere on the trans and I can't find any good info regarding it.

dad396.jpg


mike i believe the backup light comes off a switch on the tranny, at least on the manual trannys. not sure about auto but i dont remember any wires to the linkage on the few i had.

i have a borg warner T-10 top loader and it has a switch for BU lights one wire. but i guess thats not a stock application so might not help.:redneck: but from what i remember most fords took the BU from a tranny switch. even on my T-18.

if you find a switch on the trans id bet thats it.:cool:

if not im sure you can make something work as mention in the above write up.

looking good mike.
 
Last edited:
Well my dad finally found the wheels that he likes.

"Ansen Sprint" wheels. Its funny because that exactly what I pictured the car to have before he picked them out,lol..

dad416.jpg
 
Well I got home from the swapmeet and still had some energy left (more than I thought I would have,lol). So I finished popping holes in the carpet for the seatbelts and threw the belts and seats in and fully bolted them down. All I can is is "WOW" and "COOL".... I had also told my dad he needs to get some good floor mats for the car---he said "You mom already got me a nice set"...

dad417.jpg


dad418.jpg


dad419.jpg
 
So I made the decision. In the am I am going to jack it up, pull the wheels and start prepping the underside and undercoat it. I also got new splash shields that go in the front fenders. Ya they were TRASHED and quite holy,lol...

So ya tommorow will be a messy day. Plus I am going to rip the exhaust out since the new stuff came in..

dad420.jpg
 
So I went and got the wiring in the trunk roughed in and cleaned out and prepped for the final coating I am putting in it. Well crap the stuff I had (duplicolor bed coating) was all hard so I will have to skip that. In any case its ready.

dad421.jpg


So I went onto the next task--the messy task that I was not really looking forward too,lol. But back up in the air for the last time.

dad422.jpg


Started by cracking out the sawzall and removing this rusted pile.

dad432.jpg
 
So the whole day was planned for me making a mess of myself--geting the fenderwells and underside cleaned and undercoated. Lets just say the underside did not turn out perfect mainly because I was not able to get all the crap out of the cracks and so on. But the underside is now protected along with the fender wells. I was beat and a total mess by the time I got done late last night but I was fairly happy with the outcome.

I used industrial undercoating that we use in the car industry--really good stuff, very durable and use a gun or brush. I used to put the bottles in hot water to get the stuff warm (makes use easier) but made this with the heater--worked perfect...

dad423.jpg


I started with the rear fender wells-these were easy.

dad425.jpg


The fronts were more work. Started by getting behind the splash shields, painted the back side of the shields, installed both and then fully did the fenderwell. The replacements went in pretty decent. I had to notch them out a bit and the lower holes didn't line up--but the final fitment was really good.

dad426.jpg


dad427.jpg
 
Like I say the underside wasn't perfect but I got it so there is more protection.

dad428.jpg


dad429.jpg


dad430.jpg


dad431.jpg


I looked like a speckled monkey by the time I was done....
 
This is something that drove me nuts and anybody who saw them..

dad424.jpg


Remove, cut, clean, pant.. Ya much better and it sits level now..

dad433.jpg
 
Top