• Help Support Hardline Crawlers :

Little Gibby's 45 MB

Gibby1

Did I BREAK that.......
Joined
Mar 27, 2006
Messages
3,014
Time to get my son's rig up and running. The rig is a 1945 Willys MB. I purchased it from Jaydog about 2 years ago. My wife told me that I couldn't bring it home until it was running... HAHAHA

Anyway, it came with the stock 4 cyl engine, an upgraded t-case, an overdrive unit and a heater. Wipers were added as well. There's was a 3" Rancho lift.

We never did get it running before I brought it home.

We did get the Buick 231 engine rebuilt and spend a lot of time and energy getting the right throwout bearing to fit and work. The clutch assembly and adaptor parts were from Novaks.

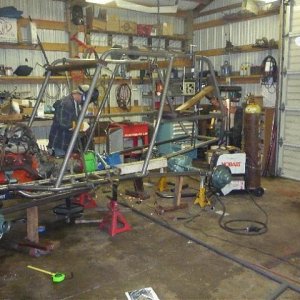
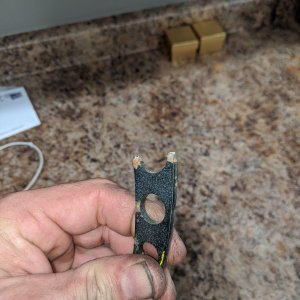
We got the engine, transmission and transfer case bolted together and in the rig with the stock crossmember holding everything in. But, it didn't fit right. I looked it over and looked it over but couldn't see what was wrong. Something was bent...

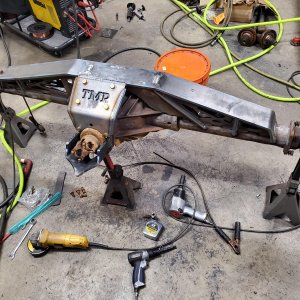
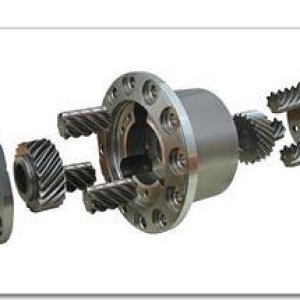
Meanwhile, I found a rebuilt set of Dana 44s setup for a CJ. I welded the perches in place and installed them under the rig. Stuck on a set of 34x10.50.15 Swamper LTBs and then it sat. The axles have 4.56 gears and Detroit lockers, front and rear. The rear is a HP with a disc brake conversion as well.

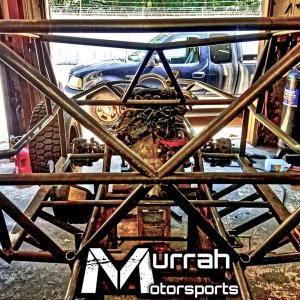
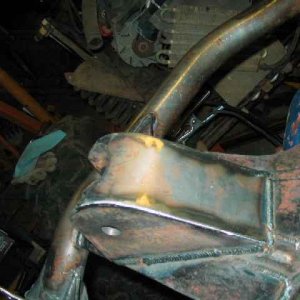
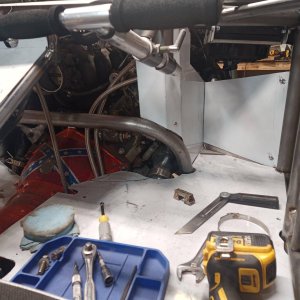
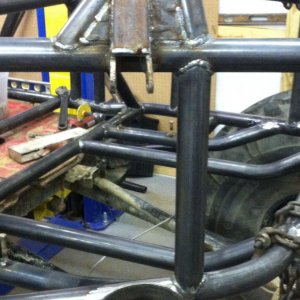
I went to my buddy crash to finish up the install but then I gave him a laundry list. I told him that I wanted to DRIVE it home. That means replacing the brake system including the pedal/master assembly, doing a complete steering assembly, cooling system, installing a second gas tank, seat rail and while it's there, might as well put the cage on it. I need to order a new windshield frame as well, the old one's a mess.

So, I got it to Mike a week ago and he's got some reports...
 
I saw it a little while after you dropped it off, looks vary similar to somthing sitting in my garage.

Anyway cant wait to see this build!
 
Ok here is how the lil rig looked when I drug it into the shop and unloaded all the stuff that was stacked in the poor thing :D It sure is a cute lil thang :;

gmb1.jpg


gmb2.jpg


gmb3.jpg


gmb4.jpg
 
So my first thing I did was kinda see what exactly was in the rig. At first I was a lil confused. There was a stack of 2 wiring harness's. One was for a toyota and the other was some GM fuel injection harness which what really confused me was---- the motor is carbed :D . So in any case I layed everything out and inspected it.

gmb5.jpg


So once I figured out what was there and what might not be there I started the looking/thinking process. The motor was just sitting in the rig and being held in place by the t-case cross member. Another thing was the fact that the motor was sitting in there sideways. At this point I got a lil more info from gibby as to just what was done up to this point. At that point my marbles were finally starting to jingle around and I was now a man with a mission and not wandering and walking into walls :D
 
So my first thing to try to get done is get the powertrain parts actually mounted in the rig. Now my knowledge of the stock MB's is pretty thin--most of the rigs I* have seen have already been done up. So I read some literature that dale sent with the rig and then did a lil reading online to get a rough idea on what was what. At this point I was able to gather what I wanted to do in my head==A man with a plan :D


So the first thing I did was take a bunch of measurements. First thing I found was the t-case was off to the drivers side (from what I gether the whole setup was setup to the drivers side). Another issue I found was I cannot get the motor level--the bellhousing/tranny hits the tub pretty hard and the motor is still not level. So at this point I figured the whole shootin match has no choice but to come forward. So I supported the powertrain and pulled the cross member and started looking at it...

Here is what I came up with

gmb6.jpg


gmb7.jpg


gmb8.jpg


As you can see, I was able to build onto the cross member and move the tranny mount location 1.5" forward and 1.5" to the passenger without taking any strength away from the cross member--and in fact if anything its a tad stronger :D

But one thing I also had to do was notch the passenger side rear of the cross member to clear the t-case and I will have to yank it back out to complete that by boxing the under side of the cross member in.
 
It has the 50cal bed mount:cool: that is way cool!!!!

Someone should invent a 50 cal paintball gun:; and mount it up :clappy:
 
boxboy said:
It has the 50cal bed mount:cool: that is way cool!!!!

Someone should invent a 50 cal paintball gun:; and mount it up :clappy:
mine has that as well.

I see a stock alternator from the orignal motor lyeing on the ground lol, Acctually can i have it?
 
So at this point I got the powertrain sitting in the rig where I wanted it with the cross member bolted up. At this point I got looking at the frame rails. Now one thing that I do know you truely want to fully box the frame in--have seen alot of these MB frames pop in places. But for now I am going to work on just the motor area and later down the road if gibby ends up having problems we will have to dig into that (alot of work).

Here are the frame rails--as you can see somebody cut some of the frame rail out (used to be 2 large holes, now one large hole,lol)

gmb9.jpg


gmb10.jpg


So I cut some frame plates out of 3/16" (1/4" is over kill)

gmb11.jpg
 
So after a BUNCH of prep work (wire wheel, some plasma and grinding) and some smoke/sparks here is how they turned out.. :;

gmb12.jpg


gmb13.jpg
 
So with basically the frame now prepped and ready It was time to work on the engine mounts. So I got the motor sitting right where I wanted it and bolted the Novak mounts to the motor. This is where I started scratching my head ..

gmb14.jpg


Here you can see where the mount sits to the frame rail. Well with the way Novak built these mounts in order to use the frame side of the mount---the motor would have to be another 2.5" higher :wtf: .

gmb15.jpg


That aint going to cut the cheese, no way in heck. I really like the motor placement and raising it is going to make the COG crappy and the need to hack the heck out of the tub for the tranns/t-case to pop thru. Not going to happen. Nooooooo way :;
 
So here is how I fixed that little problem. I cut the mounts up and used just the flat area where the actual mount is supposed to fit and built my own mounts. Here is how they ended up..

gmb16.jpg


gmb17.jpg


They shouldn't go anyplace :;
 
War-Jeeper said:
mine has that as well.

I see a stock alternator from the orignal motor lyeing on the ground lol, Acctually can i have it?

I have the ENTIRE old running motor available. It ran when we took it out but the rear main seal was leaking on the clutch. Otherwise it ran fine. Come to think of it, I think it's STILL in Jaydog's garage. I should probably go pick it up some day...

I have some old axles and driveshafts available as well. Nothing wrong with them, just not big enough for 3 times the horsepower, big tires and lockers...
 
Gibby said:
I have the ENTIRE old running motor available. It ran when we took it out but the rear main seal was leaking on the clutch. Otherwise it ran fine. Come to think of it, I think it's STILL in Jaydog's garage. I should probably go pick it up some day...

I have some old axles and driveshafts available as well. Nothing wrong with them, just not big enough for 3 times the horsepower, big tires and lockers...

How much you looking to get for that stuff?
 
Gibby said:
I have the ENTIRE old running motor available. It ran when we took it out but the rear main seal was leaking on the clutch. Otherwise it ran fine. Come to think of it, I think it's STILL in Jaydog's garage. I should probably go pick it up some day...

I have some old axles and driveshafts available as well. Nothing wrong with them, just not big enough for 3 times the horsepower, big tires and lockers...
It's in the garage behind the '71. :;
 
Top